Monday, December 31, 2012

Cinderella Topsy-Turvy Doll


I knitted a Cinderella Topsy-Turvy doll for the clever girl for Christmas!  The clever girl is about as girly as they come right now (does this change eventually??) and I knew she would enjoy a Cinderella doll.  The pattern is from Jean Greenhowe's Christmas Special knitting patterns.  Jean Greenhowe designs these amazing intricate patterns using a DK or worsted weight yarn and size 2 needles, so the knitting is super tight.  She has it all figured out down to the smallest details.  Note the tiny roses on happy Cinderella's dress and hair, complete with tiny green leaves that come out from each side of each rose.  Or note the tiny patches on the sad Cinderella's dress, and the little plaits in her hair with bows on the end.  Phew.  It was a labor of love.  Every time I thought I'd be finished with one part of the doll, I'd look closer and realize I had missed something!

If you aren't sure what a topsy-turvy doll is, here is another photo that might help:
Cinderella does not have legs.  Underneath the dress of one side is the head and dress of the other.  She does stand up, she just stands on the head and arms of the inside doll instead of legs!  She is about 12 inches tall from the bottom of her skirt to the top of happy Cinderella's bun.

Saturday, December 29, 2012

Christmas Sticky Buns

As you might remember from a Tuesday's with Dorie post back in May on Pecan Sticky Buns, my family makes sticky buns every year for Christmas morning.  I am the baker of these buns and have tweaked recipes to my preference over time.   We started with a recipe my mom found, and used this recipe until maybe 3-4 years ago, when I found another recipe that looked like it might be worth trying.  If I am going to try out a new sticky bun recipe, I have to do so NOT on Christmas day, to make sure it is Christmas-sticky-bun worthy!  The new recipe was from Cooks Illustrated, and while there were parts that I liked, there were parts I didn't.  So I have combined the two recipes to make our new "official" Christmas sticky bun recipe. 

This recipe takes a bit of time, although it's nothing compared to many of the bread recipes I have recently tried, with multiple rest periods and rising periods.  This recipe rises twice - once on the counter, once overnight in the refrigerator.  So really, the only important (thus time consuming one that you actually WAIT for) is the one on the counter.  Not so bad for a yeast bread, really.

Thursday, December 27, 2012

Daring Bakers: Panettone

The December 2012 Daring Bakers challenge was hosted by the talented Marcellina of Marcellina in Cucina.  Marcellina challenged us to create our own custom Panettone, a traditional Italian holiday bread!

I was really excited to take on the challenge of making a Panettone.  It is one of those baked goods that has always intrigued me.  Before this challenge, I had actually never eaten one before, only seen them in stores in their pretty, tall boxes.  As someone with Italian heritage however, I felt I would have to make a Panettone sooner or later!

Some history about the Panettone, anyone??  Evidently there are a variety of stories and legends about Panettone, but the hostess of this recipe favors the recipe and story that follows:  Once upon a time, a young Milanese noble fell in love with the daughter of a poor baker whose name was Tony (Antonio).  The nobleman wanted to marry the baker's daughter, so he made sure that the baker had the very best ingredients at his disposal - eggs, butter, flour, candied orange peel, citron and golden raisins.  The baker then created a wonderful bread that became known as "pan di Tonio", Tony's bread.  The baker found his fame and fortune with this bread, and the nobleman honorably married the baker's daughter!  Though this story is sweet and romantic, others claim that this could not possibly be true as Italians don't shorten any name to be "Tony", this is something English-speakers do.  However, most do agree that the Panettone comes from Milan, and the word Panettone has a base in two Italian words:  "panetto", which means "small loaf cake", and the suffix "-one" which means "large cake".  I must admit, this cake comes out looking like a large loaf cake, so at the very least there is something to this etymology.

Tuesday, December 18, 2012

TWD: Baking with Julia - Finnish Pulla

Finnish Pulla!  This was our recipe this week for the Tuesdays with Dorie group.  I have to admit, when I read that we were making a Finnish Pulla, my only thought was "what in the world is THAT?"  Just in case you are thinking the same thing, here is what I learned via Wikipedia:  A pulla bread is a mildly sweet Finnish roll or dessert bread often flavored with cardamom seeds and sometimes raisins or sliced almonds.  They tend to be braided, formed into a circle, buttered and sprinkled with sugar and almonds.  Okay, that definitely sounds good to me!

As it turns out, the Finnish Pulla in this recipe seems pretty close to the original.  The glaze on top of the dough is made with egg and milk instead of melted butter but other than that this seems pretty authentic.  And I must say, YUM.  It is quite lovely.  It calls for cardamom seeds in the pod which you then crush.  This was an extra exciting bit for me as it gave me an excuse to use the mortar and pestle we have had since we got married and have used VERY rarely.  Yippee!  I didn't crush them into a uniform powder, but left some pieces a little bigger than others, which was nice.  The cardamom flavor is very light. The bread itself is very soft and airy, sort of like a challah bread.

Sunday, December 16, 2012

Gingerbread Pancakes


To spice up our Saturday morning pancake breakfast, I made Gingerbread Pancakes!  Yum.  They are pretty much like eating gingerbread cookies for breakfast, but in pancake form.  Delicious!  I highly recommend!  They are no more time consuming than my regular buttermilk pancakes, and provide a nice holiday feeling.

Thursday, December 13, 2012

Candy Cane Crisps

Christmas baking has begun!  Our first endeavor this year was Candy Cane Crisps.  I have no idea where this recipe might have originated.  It is simply a cookie my family has made at Christmastime for as long as I can remember!  So, I'll have to credit my mom for the recipe.  She found it somewhere and knew it was a keeper!

This recipe makes a light and crisp cookie that is delicious and fun to make.  If you have a child in your life, this might be a recipe to enjoy together.  It is for my family!

The first task for these cookies is to prepare the candy canes.  The recipe calls for a total of 3/4 cup of coarsely crushed candy canes.  I used an entire box of the small candy canes and had way too much for the cookies, but boy are they lovely sprinkled on top of ice cream!  And they are perfect additions to decorating gingerbread cookies as well!  So, while I am not sure exactly what quantity of what size candy canes you will need, I doubt any extras will go to waste.  In my experience, the little bitty candy canes are the easiest to crush, but you can also use the bigger canes or the gigantic ones that look like a big police baton.

Regardless of what you use, they need to be crushed.  Again, I have found that unwrapping them all and putting them in a ziplock bag (sometimes a double-bag) and bashing them with a meat tenderizer is the best (and most fulfilling) method.  You can also put them in a food processor or blender cup, but be prepared for the blade to get really sticky and the pieces to be pretty uniform.  The clever girl/sous chef bashed the candy canes for me this year, and had a marvelous time!

 Be proud of your crushed candy cane accomplishment!!

Now you can start the recipe.  First, beat powdered sugar and butter together until creamy, then add vanilla extract. 

Add flour, oats and salt and mix until blended.  Check out the beater-blade action!  Yahoo!  I love my mixer.

Gently stir in 1/4 cup of the beautifully crushed candy canes.

Take a break and have a delicious sweet reward for your efforts!!!

Okay, back to the task at hand.  There are three basic steps to preparing the cookies for baking: 
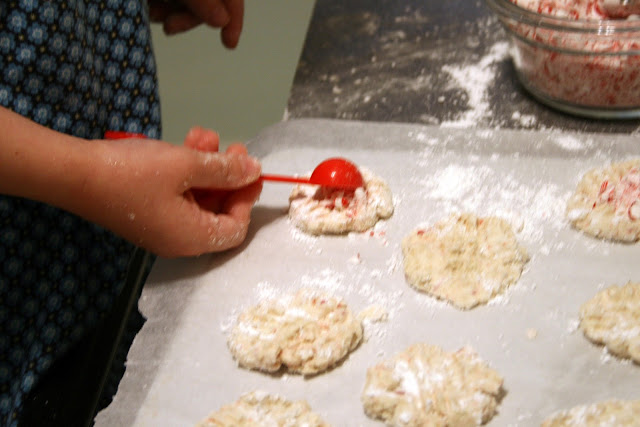
Step 1:  roll about a teaspoon-full of dough into a 3/4 inch ball and roll that ball in powdered sugar.  We split this task - I made the initial dough ball, and the clever girl rolled the ball into powdered sugar!  By the way, you could use a greased and floured cookie sheet for this, but I highly recommend a parchment-lined sheet.

Step 2:  use a fork and do a criss-cross pattern across each dough ball, flattening (but not totally annihilating) the dough.
Step 3:  sprinkle each cookie with about 1/2 teaspoon crushed candy canes.  If you spill some candy canes onto the cookie sheet, pick them up.  They will melt and stick to the cookie sheet and become a big mess.  If you don't use parchment paper, this is where you'll wish you had! 

 Ready to go into the oven!  They bake for 12-18 minutes at 325F.

Done!  The dough itself is light and buttery, and the melted candy canes on top give the cookies a nice crunch, plus a yummy peppermint taste!  They are  excellent with a mug of hot cocoa!

Candy Cane Crisps
adapted from my mom

1 cup butter, at room temperature
1 cup unsifted powdered sugar
1 1/2 teaspoons vanilla
1 1/3 cup all-purpose flour
1 cup old-fashioned oats
1/2 teaspoon salt
1/4 cup coarsely crushed candy canes
additional powdered sugar, approx. 1/4 cup, for rolling
1/2 cup coarsely crushed candy canes, for topping

Preheat oven to 325F and line a baking sheet with parchment paper.  
Cream the butter and sugar until light and fluffy, then mix in the vanilla.  Add flour, oats and salt and mix until well blended.  Gently stir in 1/4 cup candy canes.  Roll rounded teaspoon-fulls of the dough into 3/4-inch balls, then roll the balls in powdered sugar.  Place the balls about 2 inches apart on prepared baking sheet.  Using a fork, flatten the cookies in a criss-cross pattern, and sprinkle each cookie with about 1/2 teaspoon crushed candy canes. 

Bake 12-18 minutes until lightly browned.  Let cool on pan for 2 to 3 minutes, then transfer to racks to cool completely.

Makes about 4 dozen cookies.
Printable Recipe

Give this recipe a try!  They are fun to make and just delicious to eat!  I realized when making these that they have no eggs, so they might be a great choice for someone with an egg allergy!  I have friends with kids that have all sorts of allergies, so I am excited when I come across something potentially helpful to them! 

Monday, December 10, 2012

Turkey Chili

It has finally gotten cool here in Houston, so I made some Turkey Chili to celebrate the weather.  Seriously, readers, it has been in the 80's lately and it's driving me batty!  I do realize that I live in Texas but can't it just get sort-of wintery in December?  Ugh.  Finally, a cold front has come through and I am ECSTATIC.   The clever girl is, too.  She certainly comes from me, as every day she asks whether she can wear long sleeves and long pants because it is "supposed" to be wintertime, and is so disappointed when the answer is no.  She has repeatedly told me that in the winter there is supposed to be snow and we should be wearing scarves and hats and gloves, and that Houston weather is just "not right".  That's my girl!

Anyway, on to the chili!  This recipe comes from Cooking Light and I change it up a bit sometimes but mostly stick to what the recipe calls suggests.  It is yummy and perfect for a cool day!

Friday, December 7, 2012

Pasta with Pumpkin and Sausage


You may have been wondering if I would figure out some sort of savory pumpkin dish during my pumpkin frenzy.  Here it is!  Pasta with Pumpkin and Sausage!  It is a super easy weeknight meal that is a nice different take on your typical pasta dish.  Ever had a pumpkin sauce with pasta before?  You should try this one!  It's delicious!

Tuesday, December 4, 2012

TWD: Baking with Julia - Gingerbread Baby Cakes


Our recipe this week for Tuesday's with Dorie was Gingerbread Baby Cakes.  I was really looking forward to this recipe, so I was thrilled to give it a go!  And perfect timing!  Now that it is December, gingerbread is the perfect treat!

Karen, of Karen's Kitchen Stories, was the host of this recipe, and you may find the written out recipe on her blog.  You can also see what other bakers thought of this recipe by visiting the Tuesdays with Dorie blog and clicking on the LYL: Gingerbread Baby Cakes tab.  This is where we all leave links to our blogs where we post our success with each recipe!

Anyway, on with the recipe.  I have never made a gingerbread cake before, so the only gingerbread-type item I can compare this to is gingerbread cookies.  I have yet to find a FAVORITE gingerbread cookie recipe, however.  It seems like most that I try are either too bland or the texture is too crunchy or too soft.  I like a cookie that is somewhere in between crunchy and soft, with a crunchy exterior but the soft interior.  If anyone has a favorite gingerbread cookie like this, please send it my way!!  Anyway, I digress.  In comparing this recipe to the cookie recipes I have made, I found many differences.  There were many more flavor profiles in this cake.  Whereas the cookies generally have molasses and a selection of cloves, cinnamon, allspice, ginger and nutmeg (or all of the above), the only of those spices that this recipe had was the ginger.  Instead of all of the other spices, this cake recipe included espresso powder, cocoa powder and chopped fresh ginger.  Plus there were 2 cups of molasses, which is a LOT.  We'll get to the molasses later.  Let's start with espresso powder.

Sunday, December 2, 2012

Christmas Crafts with Kids: Ribbon Garland


Are you looking for a fun craft to do with your kiddo during Christmastime?   Make a ribbon garland for your Christmas tree!  It can take as long as you want it to, only limited to how long you want the garland to be or how much attention span your kiddo might have.  You could also work on it in spurts, so it doesn't get too tedious at one setting. Regardless, you will end up with a beautiful garland for your tree that you can use for years to come!