Tuesday, July 31, 2012
TWD: Baking with Julia - Blueberry-Nectarine Pie
There were 5 Tuesdays in July, so we had 3 projects this month! This week's recipe for Tuesdays with Dorie is Blueberry-Nectarine Pie. I actually made mine for a July 4th party, hence the decorations you'll see below. I have to say I am a real sucker for a good fruit pie. Of all desserts, I love pie the most. Which is not to say I don't like others. I don't want any desserts to go off feeling un-loved by that statement. I happen to like all desserts, fortunately for my baking endeavors but unfortunately for my waistline! Pies just happen to be my favorites.
Now when I first saw that this was going to be a blueberry-nectarine pie, I had a slight worry. The nectarines and peaches I had been seeing at the grocery store were more like rocks disguised as fruit. Terrible! They never ripen. Some even SMELLED like fruit (tricky rocks) but remained rocks on my counter. Grrr. Then, a miracle occurred! I happened by some nectarines at Costco of all places, which not only looked and smelled like nectarines, but they were soft and truly appeared to be fruit instead of rocks! I bought a box and have been dancing the happy dance ever since. Yippee!
To make a Blueberry-Nectarine Pie, you first start with Flaky Pie Dough. The recipe can be found on page 31 of Baking with Julia, or here and here online. I do have a favorite pie crust recipe and it gave me pause to consider making a different one, but this is a challenge and by golly I would try that different recipe! And I am glad I did! The dough was a bit harder to work with than my usual one (stickier to roll) but it did create a delicious flaky pie crust! So if you are up for another recipe, here's how it goes:
Labels:
baking,
pie,
Tuesdays with Dorie
Sunday, July 29, 2012
Kiddo Pajamas - a Tutorial!
I had this inspiration to make pajamas for the clever girl. Most jammies are the cotton knit sort but I thought a lightweight cotton would be comfy, so I went to work! For material, I used and old sheet that my sister had stamped a decoration on and given to me as a gift about a zillion years ago. We got a bigger bed, the sheets got put in a stack of sheets for the guest room and they are rarely used. They are super soft and with that cute stamped border I figured they'd make great pajamas. I can honestly say that when I showed them to the clever girl, her first comment was "Momma, they are so soft and snuggle-y!" She now calls them the snuggle-y pajamas. Don't overlook old sheets when thinking of material for sewing! Re-purpose some old sheets into something soft and snuggle-y!
The pants were the easy part. I went over to MADE and used her tutorial for kid pants! Her tutorial is for size 2-3, so I increased the long side by 1/2 inch in width, made the pants leg 1/2 inch longer, and made the rise 1 inch longer. The pants are big and roomy on the clever girl, so there is definite room to grow. Since I used the sheet border as the hem, I wanted to make sure the pants were plenty long since I would not be creating a big hem that could later be let down. As is, the pants pool around her feet a bit but that is alright with me.
This is my first clothing tutorial type thing so bear with me. I did not take any pictures along the way so I will do my best to be super descriptive. For the top, I first sketched it out on a piece of paper, as shown below. The measurements provided are FINISHED sizes.
Saturday, July 28, 2012
Vacation
We left for vacation early this morning, and will be gone for about 2 1/2 weeks. I have many posts scheduled to appear in my absence and will be working on some new projects while I am gone. While I intend to check my blog with some regularity, I may not respond to a comment as quickly as usual. Both my in-laws and my parents are celebrating their 50th anniversaries this summer and we are going to visit each family to celebrate! What a blessing! It will be a fantastic (and probable somewhat exhausting) trip! We are headed to upstate New York and St. Louis.
There will be some baking adventures while I am gone, as the Tuesdays with Dorie challenges are already scheduled. In addition, I am baking a tiered wedding-style cake for my parent's celebration. I have never attempted something like this before so wish me luck! I'm excited for the challenge.
I have started a new knitting project for the trip as well. I just can't travel without a knitting project! So, there is a new project on the needles just waiting to be created!
There will be lots to discuss when I return. Farewell for now! Have a good couple of weeks!
-one clever mom
There will be some baking adventures while I am gone, as the Tuesdays with Dorie challenges are already scheduled. In addition, I am baking a tiered wedding-style cake for my parent's celebration. I have never attempted something like this before so wish me luck! I'm excited for the challenge.
I have started a new knitting project for the trip as well. I just can't travel without a knitting project! So, there is a new project on the needles just waiting to be created!
There will be lots to discuss when I return. Farewell for now! Have a good couple of weeks!
-one clever mom
Friday, July 27, 2012
Perfect Classic Pound Cake
I have been babysitting some chickens while a neighbor went on vacation. Yep, you read that right, chickens! No, I do not live in the country, I actually live in an urban area but my neighbors have chickens! When they go on vacation, I chicken-sit for them. Hence, I have lots of fresh eggs. It is really quite fun to chicken-sit. The clever girl thinks it is so great to see the chickens and she even gets to pet them! They are nice girls. And she LOVES getting the eggs and carefully carrying them home. It's great!
But now I am about to go on vacation, and I had to use these awesome eggs! Trust me, I've been making omelets and quiches galore, but we still had lots of eggs! Eureka! I found a recipe for the Perfect Classic Pound Cake, which takes a total of 12 eggs!
My beautiful eggs. I put them in an egg carton for storage, but I promise you, they came straight from the girls down the street. Girls, as in chickens.
Daring Bakers: Crazy for Crackers!
Our Jully 2012 Daring Bakers' Host was Dana McFarland and she challenged us to make homemade crackers! Dana showed us some techniques for making crackers and encouraged us to use our creativity to make each cracker our own by using ingredients we love.
While I knew it was possible to make crackers, I must admit it was not something to which I had given much thought. So when the July challenge was announced, I was intrigued! Crackers! Hmmm.
There are several methods for making crackers, and part of our assignment was to try two different methods. Crackers can be made by hand rolling, using pasta rollers, and by putting them in the icebox and slicing. While I do own a pasta roller, I opted to use the two other methods for my crackers: hand rolling and icebox. Crackers are surprisingly easy and fun to make! Why didn't I think of this sooner?
I was thrilled to discover a recipe for homemade Ritz crackers. We eat a LOT of Ritz crackers, or "circle crackers", as the clever girl calls them. To make my own without the bizarre unpronounceable ingredients from the packaged Ritz would be fantastic! Stef, of the Cupcake Project, went on a mission at one point to create the perfect Ritz cracker. Yahoo, because she baked about a zillion crackers before figuring it out! I benefited from her mission! Thanks, Stef!
While I knew it was possible to make crackers, I must admit it was not something to which I had given much thought. So when the July challenge was announced, I was intrigued! Crackers! Hmmm.
There are several methods for making crackers, and part of our assignment was to try two different methods. Crackers can be made by hand rolling, using pasta rollers, and by putting them in the icebox and slicing. While I do own a pasta roller, I opted to use the two other methods for my crackers: hand rolling and icebox. Crackers are surprisingly easy and fun to make! Why didn't I think of this sooner?
I was thrilled to discover a recipe for homemade Ritz crackers. We eat a LOT of Ritz crackers, or "circle crackers", as the clever girl calls them. To make my own without the bizarre unpronounceable ingredients from the packaged Ritz would be fantastic! Stef, of the Cupcake Project, went on a mission at one point to create the perfect Ritz cracker. Yahoo, because she baked about a zillion crackers before figuring it out! I benefited from her mission! Thanks, Stef!
Labels:
appetizers,
baking,
Daring Bakers
Wednesday, July 25, 2012
Lisette Diplomat Dress
I sewed something for me! The vast majority of my sewing tends to be for the clever girl or for gifts, so I have been determined this summer to make some things for me. My first accomplishment is this dress! It is a Lisette pattern, the Diplomat Dress, and you can find it as Simplicity 1878. JoAnns recently had a sale with all Simplicity patterns for $1.99 so I stocked up on some of the Lisette patterns! You just can't beat that price! Lisette patterns are made by the same company/designers that make Oliver + S patterns for kids. Those are my very favorite kids clothing patterns, so I was super-thrilled when they came out with an adult line!
These patterns are sized like most sewing patterns, in that the size you wear in a store is NOT AT ALL what you would make. It is totally crazy and plays a bit with your self image but you just have to get over that if you are going to sew for yourself.
So here is my Diplomat Dress. I used an organic cotton I purchased from Sew Mama Sew. I have never used organic cotton and it is nice and soft and washes well. I made style A, with the length of style B. According to my dimensions, I made the size that should have been perfect (a 14) but it ended up gigantic. So I took it in quite a bit and now it works fine. It is still a bit bigger than I might prefer in the neckline/shoulders but not enough to be a problem at all. It just lets me know that I could have probably made a 12, so I may do the 12 in the next pattern and hope they all run a bit big... We'll see.
These patterns are sized like most sewing patterns, in that the size you wear in a store is NOT AT ALL what you would make. It is totally crazy and plays a bit with your self image but you just have to get over that if you are going to sew for yourself.
So here is my Diplomat Dress. I used an organic cotton I purchased from Sew Mama Sew. I have never used organic cotton and it is nice and soft and washes well. I made style A, with the length of style B. According to my dimensions, I made the size that should have been perfect (a 14) but it ended up gigantic. So I took it in quite a bit and now it works fine. It is still a bit bigger than I might prefer in the neckline/shoulders but not enough to be a problem at all. It just lets me know that I could have probably made a 12, so I may do the 12 in the next pattern and hope they all run a bit big... We'll see.
Monday, July 23, 2012
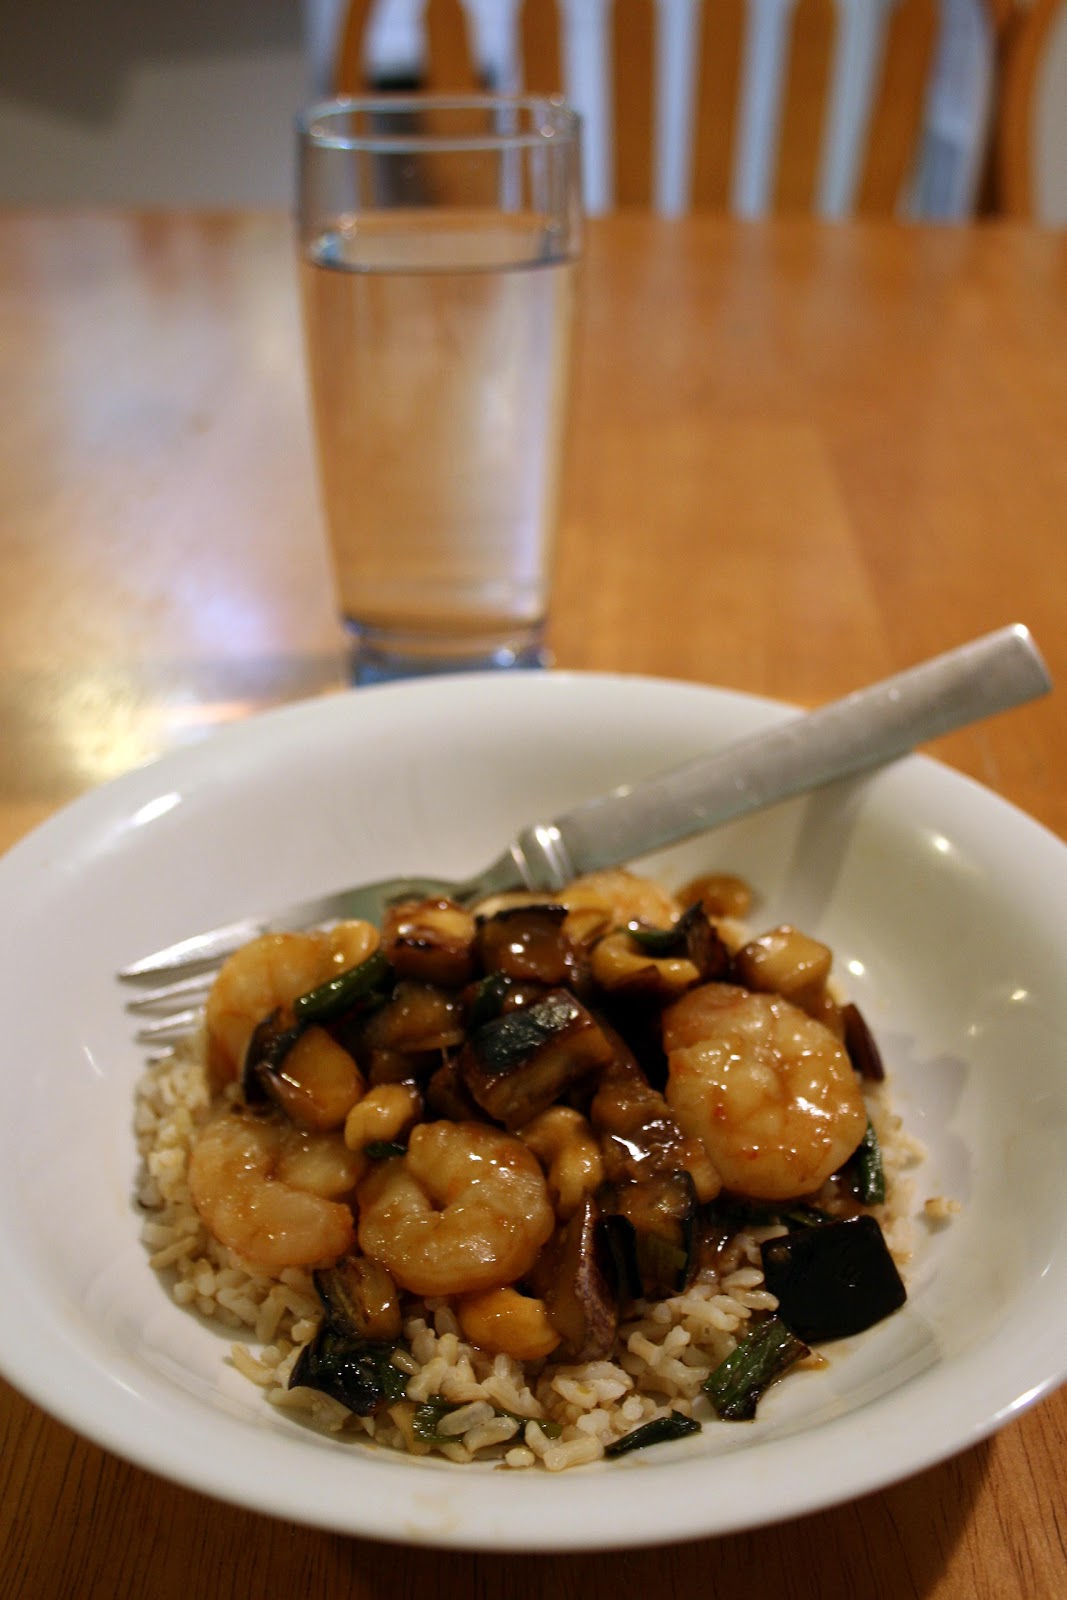
Stir-Fried Shrimp with Garlicky Eggplant, Scallions, and Cashews
This is a really good shrimp stir-fry dish with a ridiculously long name: Stir-fried Shrimp with Garlicky Eggplant, Scallions, and Cashews. The recipe is from Cooks Illustrated. Maybe that day they were just out of brainstorms for a shorter name or something. I call it Shrimp and Eggplant Stir-fry. I think that is good enough.
Shrimp and Eggplant Stir-fry
aka Stir-fried Shrimp with Garlicky Eggplant, Scallions, and Cashews
adapted from Cooks Illustrated
Serves 4
Serve over brown rice.
6 medium garlic cloves, 1 minced or pressed through garlic press, 5 thinly sliced
1 pound extra-large (21-25) shrimp, peeled, deveined, and tails removed
3 tablespoons vegetable oil
1/2 teaspoon table salt
2 tablespoons soy sauce (I use low-sodium Tamari)
2 tablespoons oyster sauce
2 tablespoons dry sherry or Shaoxing wine
2 tablespoons sugar
1 tablespoon toasted sesame oil
1 tablespoon white vinegar (I use rice vinegar)
1/8 teaspoon red pepper flakes
2 teaspoons cornstarch
6 large scallions, greens cut into 1-inch pieces and whites sliced thin
1/2 cup cashews, unsalted
1 medium eggplant (about 3/4 pound), cut into 3/4-inch dice
Combine minced garlic with shrimp, 1 tablespoon vegetable oil, and salt in medium bowl. Let shrimp marinate at room temperature 30 minutes. Depending on your particular brown rice (regular, instant, etc.) start your rice as appropriate.
Meanwhile, whisk soy sauce, oyster sauce, sherry, sugar, sesame oil, vinegar, red pepper flakes, and cornstarch in small bowl. Combine sliced garlic with scallion whites and cashews in another small bowl. Heat 1 tablespoon oil in 12-inch nonstick skillet or a wok over high heat until just smoking. Add eggplant and cook, stirring frequently, until lightly browned, 3 to 6 minutes. Add scallion greens and continue to cook until scallion greens begin to brown and eggplant is fully tender, 1 to 2 minutes longer. Transfer vegetables to medium bowl.
Heat remaining tablespoon oil to now-empty skillet/wok. Add cashew mixture and cook, stirring frequently, until just beginning to brown, about 30 seconds. Add shrimp, reduce heat to medium-low, and cook, stirring frequently, until shrimp are light pink on both sides, 1 to 1½ minutes. Whisk soy sauce mixture to recombine and add to skillet/wok. Return to high heat and cook, stirring constantly, until sauce is thickened and shrimp are cooked through, 1 to 2 minutes. Return vegetables to skillet, toss to combine, and serve.
Printable Recipe
Besides the marinating, which you have to remember in advance, this recipe is really quite fast and makes for a great weekday meal! The flavors really compliment each other well!
Shrimp and Eggplant Stir-fry
aka Stir-fried Shrimp with Garlicky Eggplant, Scallions, and Cashews
adapted from Cooks Illustrated
Serves 4
Serve over brown rice.
6 medium garlic cloves, 1 minced or pressed through garlic press, 5 thinly sliced
1 pound extra-large (21-25) shrimp, peeled, deveined, and tails removed
3 tablespoons vegetable oil
1/2 teaspoon table salt
2 tablespoons soy sauce (I use low-sodium Tamari)
2 tablespoons oyster sauce
2 tablespoons dry sherry or Shaoxing wine
2 tablespoons sugar
1 tablespoon toasted sesame oil
1 tablespoon white vinegar (I use rice vinegar)
1/8 teaspoon red pepper flakes
2 teaspoons cornstarch
6 large scallions, greens cut into 1-inch pieces and whites sliced thin
1/2 cup cashews, unsalted
1 medium eggplant (about 3/4 pound), cut into 3/4-inch dice
Combine minced garlic with shrimp, 1 tablespoon vegetable oil, and salt in medium bowl. Let shrimp marinate at room temperature 30 minutes. Depending on your particular brown rice (regular, instant, etc.) start your rice as appropriate.
Meanwhile, whisk soy sauce, oyster sauce, sherry, sugar, sesame oil, vinegar, red pepper flakes, and cornstarch in small bowl. Combine sliced garlic with scallion whites and cashews in another small bowl. Heat 1 tablespoon oil in 12-inch nonstick skillet or a wok over high heat until just smoking. Add eggplant and cook, stirring frequently, until lightly browned, 3 to 6 minutes. Add scallion greens and continue to cook until scallion greens begin to brown and eggplant is fully tender, 1 to 2 minutes longer. Transfer vegetables to medium bowl.
Heat remaining tablespoon oil to now-empty skillet/wok. Add cashew mixture and cook, stirring frequently, until just beginning to brown, about 30 seconds. Add shrimp, reduce heat to medium-low, and cook, stirring frequently, until shrimp are light pink on both sides, 1 to 1½ minutes. Whisk soy sauce mixture to recombine and add to skillet/wok. Return to high heat and cook, stirring constantly, until sauce is thickened and shrimp are cooked through, 1 to 2 minutes. Return vegetables to skillet, toss to combine, and serve.
Printable Recipe
Besides the marinating, which you have to remember in advance, this recipe is really quite fast and makes for a great weekday meal! The flavors really compliment each other well!
Subscribe to:
Posts (Atom)