Christmas baking has begun! Our first endeavor this year was Candy Cane Crisps. I have no idea where this recipe might have originated. It is simply a cookie my family has made at Christmastime for as long as I can remember! So, I'll have to credit my mom for the recipe. She found it somewhere and knew it was a keeper!
This recipe makes a light and crisp cookie that is delicious and fun to make. If you have a child in your life, this might be a recipe to enjoy together. It is for my family!
The first task for these cookies is to prepare the candy canes. The recipe calls for a total of 3/4 cup of coarsely crushed candy canes. I used an entire box of the small candy canes and had way too much for the cookies, but boy are they lovely sprinkled on top of ice cream! And they are perfect additions to decorating gingerbread cookies as well! So, while I am not sure exactly what quantity of what size candy canes you will need, I doubt any extras will go to waste. In my experience, the little bitty candy canes are the easiest to crush, but you can also use the bigger canes or the gigantic ones that look like a big police baton.
Regardless of what you use, they need to be crushed. Again, I have found that unwrapping them all and putting them in a ziplock bag (sometimes a double-bag) and bashing them with a meat tenderizer is the best (and most fulfilling) method. You can also put them in a food processor or blender cup, but be prepared for the blade to get really sticky and the pieces to be pretty uniform. The clever girl/sous chef bashed the candy canes for me this year, and had a marvelous time!
Be proud of your crushed candy cane accomplishment!!
Now you can start the recipe. First, beat powdered sugar and butter together until creamy, then add vanilla extract.
Add flour, oats and salt and mix until blended. Check out the beater-blade action! Yahoo! I love my mixer.
Gently stir in 1/4 cup of the beautifully crushed candy canes.
Take a break and have a delicious sweet reward for your efforts!!!
Okay, back to the task at hand. There are three basic steps to preparing the cookies for baking:
Step 1: roll about a teaspoon-full of dough into a 3/4 inch ball and roll that ball in powdered sugar. We split this task - I made the initial dough ball, and the clever girl rolled the ball into powdered sugar! By the way, you could use a greased and floured cookie sheet for this, but I highly recommend a parchment-lined sheet.
Step 2: use a fork and do a criss-cross pattern across each dough ball, flattening (but not totally annihilating) the dough.
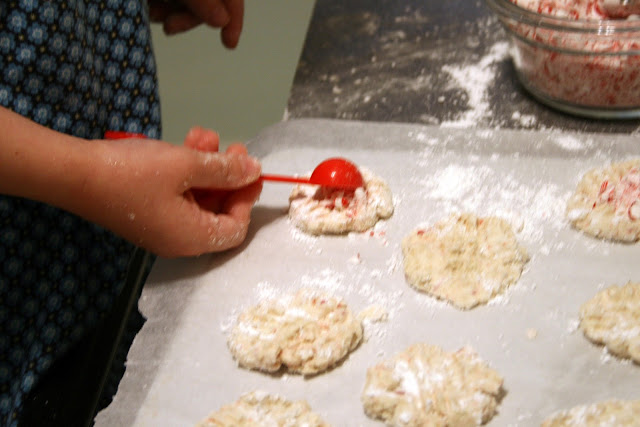
Step 3: sprinkle each cookie with about 1/2 teaspoon crushed candy canes. If you spill some candy canes onto the cookie sheet, pick them up. They will melt and stick to the cookie sheet and become a big mess. If you don't use parchment paper, this is where you'll wish you had!
Ready to go into the oven! They bake for 12-18 minutes at 325F.
Done! The dough itself is light and buttery, and the melted candy canes on top give the cookies a nice crunch, plus a yummy peppermint taste! They are excellent with a mug of hot cocoa!
Candy Cane Crisps
adapted from my mom
1 cup butter, at room temperature
1 cup unsifted powdered sugar
1 1/2 teaspoons vanilla
1 1/3 cup all-purpose flour
1 cup old-fashioned oats
1/2 teaspoon salt
1/4 cup coarsely crushed candy canes
additional powdered sugar, approx. 1/4 cup, for rolling
1/2 cup coarsely crushed candy canes, for topping
Preheat oven to 325F and line a baking sheet with parchment paper.
Cream the butter and sugar until light and fluffy, then mix in the vanilla. Add flour, oats and salt and mix until well blended. Gently stir in 1/4 cup candy canes. Roll rounded teaspoon-fulls of the dough into 3/4-inch balls, then roll the balls in powdered sugar. Place the balls about 2 inches apart on prepared baking sheet. Using a fork, flatten the cookies in a criss-cross pattern, and sprinkle each cookie with about 1/2 teaspoon crushed candy canes.
Bake 12-18 minutes until lightly browned. Let cool on pan for 2 to 3 minutes, then transfer to racks to cool completely.
Makes about 4 dozen cookies.
Printable Recipe
Give this recipe a try! They are fun to make and just delicious to eat! I realized when making these that they have no eggs, so they might be a great choice for someone with an egg allergy! I have friends with kids that have all sorts of allergies, so I am excited when I come across something potentially helpful to them!


