

With a lemon cake and lemon curd filling, it seemed natural that I should have lemon butter-cream icing. Though I am a fan of Swiss meringue butter-cream, I chose not to use this for the anniversary cake project. I did a traditional butter cream, with butter and shortening. I based the recipe off of the Repressed Pastry Chef's Buttercream Dream Icing. This is a great butter-cream recipe. You might want to print it out because it is a good standby. By the way, the cake in the photo above looks lopsided but it wasn't that way in person!

It is hard to figure out how much icing you might need to frost a cake. I found some chart (I think it was Wilton) which indicated that for the sizes of cakes I was making, I would need to make 4 batches. Each batch makes 4 cups of icing so that is a ton! Above are the ingredients for 4 batches of icing. Do you see the three bags of confectioner's sugar? Yikes!
Anyway, I wanted to make the icing nice and zippy to go with the cake, so I added a teaspoon of lemon extract and 2 teaspoons of lemon zest to each batch. It was delicious!

Then add very cold heavy cream until you reach the desired consistency. I ended up using about 3/4 of a cup of heavy cream per batch to get the consistency I wanted for icing the cake. Whatever consistency you desire, just make sure you add the cream very slowly so you don't go too far! Add food coloring gel until you get the color you want. I used 4 drops of Ateco lemon yellow gel.

This giant bowl contains 3 recipes of icing. At this point I decided to start working on the cakes, as this seemed like a tremendous quantity! It is a good thing, as I had quite a bit left over so I definitely did not need that 4th batch. I am not even sure I needed the third batch, but I did not measure the end amount. It was quite a bit though... I'd hazard to say it was about a full recipe! I say it is better to have too much than too little!
Lemon Butter-cream Icing
adapted from the Repressed Pastry Chef
1 stick salted butter, room temperature
1 stick un-salted butter, room temperature
1 cup white shortening
1 teaspoon lemon extract
2 teaspoons lemon zest
2 pounds confectioner's sugar (powdered sugar, 10x)
2 tablespoons meringue powder - optional
~12 tablespoons very cold heavy cream
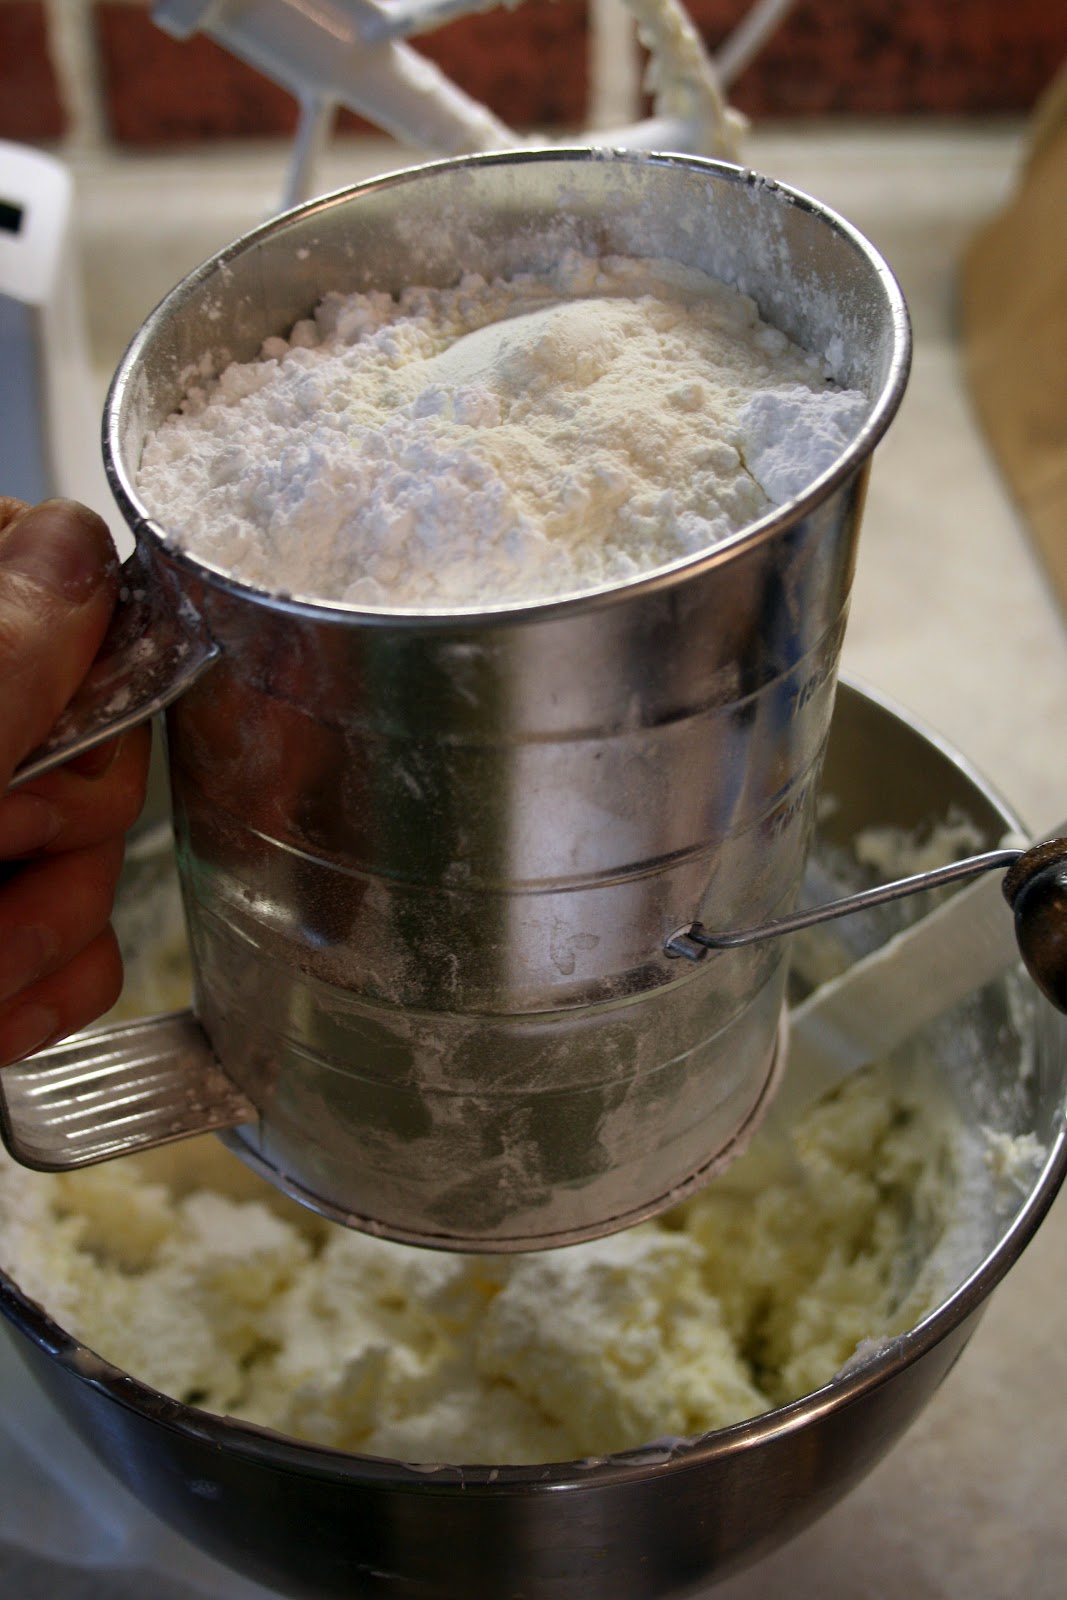
Cream the butter and shortening in the bowl of a stand mixer. Add lemon extract and zest and combine well. Begin to sift in the sugar a little at a time, mixing thoroughly after each addition. If using meringue powder, add this with the confectioners sugar. Once all of the sugar has been added and mixed well, begin to add very cold heavy cream, a tablespoon at a time, until you reach the desired consistency.
Printable Recipe


Once all of the cake layers were iced, they all went into the refrigerator to harden the icing a bit. After a couple of hours it was nice and firm and I was able to get the icing smoothed out. I have never had success at smoothing icing before so I was really crossing my fingers! And it worked! I used a Viva paper towel (they are nice and smooth and soft) and pressed it gently over the icing and then rubbed lightly with my fingers. The icing smoothed out nicely. It was not a perfect smooth look like fondant, but for butter cream I think it worked pretty well!
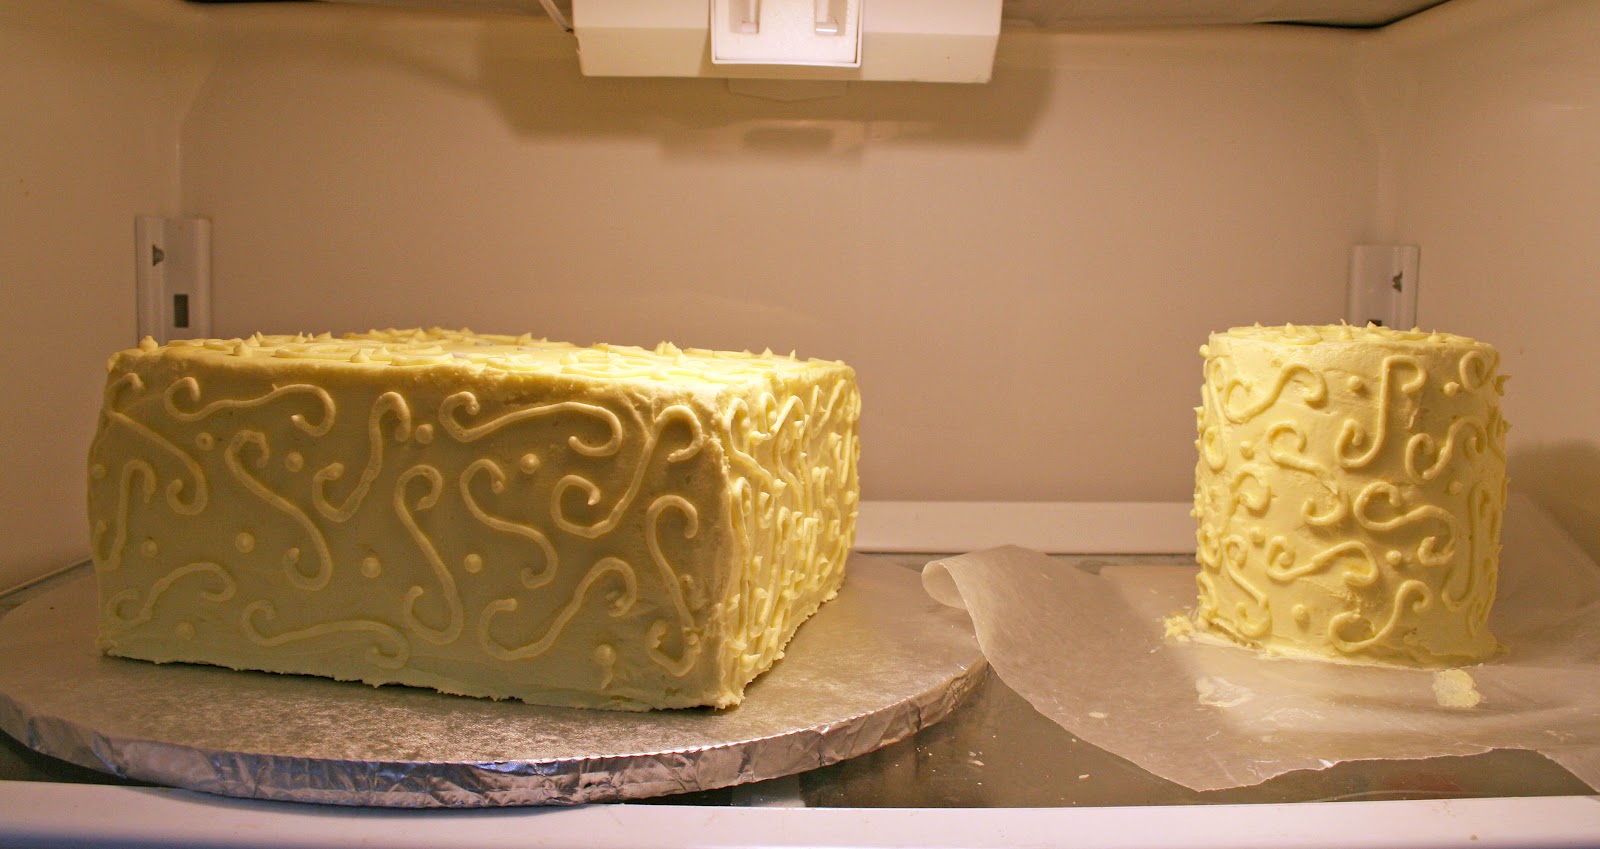

I made some swirls and dots on the sides and top of each layer with a number 5 tip and put them back into the refrigerator. I would bring the layers to my parent's church separately, and stack the cake there. This is another activity I was a bit nervous about. My sister said I was being Hermione Granger... reading a lot about something and deciding I could do it! I just hoped I would be as successful as Hermione!
No comments:
Post a Comment
Due to some bizarre spam comments I have recently received, I am moderating the comments for a while. I hope this spam craziness stops so this becomes unnecessary!