Back in early 2014, the Daring Bakers group made something called Beautiful Bread. Aptly named, right? There were two recipes, one involving a cinnamon filling, the other a Nutella filling. Above is the cinnamon bread. I do intend to make the Nutella one some day, though.
While I tend to make desserts that look sort of complicated but actually aren't, this one does actually have a lot of steps. But it is SO SO worth it. I mean, really, is that some beautiful bread, or what?? Essentially, you make a sweet dough that is divided into 4 parts and rolled out into 8-inch circles. Each circle gets a layer of butter and cinnamon sugar, and then the next layer is placed on the top, ending with the 4th layer. With some fancy cutting and twisting, you end up with the bread you see above. Here is how it's done:
Beautiful Cinnamon Bread
adapted from Daring Bakers
Makes 8 servings
Ingredients:
Dough
1/4 cup warm water
3/4 cup warm milk
1 large egg
1/4 cup butter, softened
1/4 cup white sugar
1/2 teaspoon salt
3 1/4 cups all-purpose flour
2 teaspoons dry yeast
1/4 teaspoon cardamom, optional
Cinnamon Filling
1/2 stick butter
4 TB cinnamon
1/2 cup sugar
Topping
1/4 cup milk
1 TB sugar
For drizzling
1 can sweetened condensed milk
Directions:
Whisk the egg with the water, milk, butter and yeast, and set aside. Sift the flour, salt and cardamom in a separate bowl. Add the liquid ingredients to the dry and knead until the dough is smooth. Brush a large bowl with oil and place the dough inside, covering with a damp cloth. Leave in a warm place to double in size.
Once the dough has doubled, turn it onto a lightly floured surface and divide into 4 equal parts. Roll each part into a circle that is at least 8-inches in diameter. Mix the cinnamon and sugar topping together. Brush the first circle with butter, then sprinkle with cinnamon sugar. Place a second layer atop the first and repeat the butter and cinnamon sugar. Do the same with the third circle. Top with the last, fourth layer and brush with butter. With a sharp knife, cut the dough into 8 equal triangles.
Now, make cuts in the center of each triangle that go 2/3 of the way down, not reaching the outer edge or the tip.
Take one of the triangles and gently fold the tip down and poke it into the cut you made, and then pull it down through the cut and back up so the tip is back on top. I unfortunately did not photograph this step, but this is sort of a graphic to demonstrate how it will look:
It's dreadful, sorry, but if you are making this, hopefully this image will help out. Do this with each triangle and arrange on a parchment covered baking sheet. Now pinch the bottom corners of each triangle together, into the middle. So they are not being pinched to the triangle on either side but rather it's own left and right corners are being pulled together and pinched. While you are working on this, preheat your oven to 500F.
Brush the dough with the sweetened milk topping. Allow the dough to rest for 15 minutes, then place into your hot oven (rack in center). Bake for 5 minutes, then lower the temperature to 400F and bake for 15-20 more minutes, or until the underside is golden brown. Allow to cool for 5 minutes and then transfer to a rack and drizzle with sweetened condensed milk while warm.
Printable recipe
Bask in the glow of the most beautiful "cinnamon rolls" you have ever made!
Showing posts with label bread. Show all posts
Thursday, October 1, 2015
Tuesday, May 5, 2015
TWD - Baking with Julia: Ka'kat
I took a bit of a hiatus from TWD for reasons unknown even to me. It just got away from me, I guess. And I missed some recipes that looked to be quite good, so I'll have to make them up at some point! This week, though, was Ka'kat. Are you thinking, "what the heck?" I was too. I would say that bagel+pretzel=ka'kat. Technically, this bread is supposed to be covered with sesame seeds (I was out) and flavored with something called mahleb. I didn't even look for mahleb as I remembered this week's recipe on MONDAY and it was due to be posted on Tuesday. However, it turns out that Penzey's actually carries mahleb - it is the pit of a dried sour cherry. Now I know! At least I know it is fairly easily accessible!
So, my ka'kat are sesame-less and mahleb-less, but still quite good! They have the texture of a soft pretzel (which I love) but more of the flavor of a roll or bagel. I thought it could use more salt, but that could be because my brain was thinking PRETZEL. Best of all, this little guy was easy to make with only a short rise time. In fact my handy mixer stayed in it's cabinet the entire day, as all I needed for this bread was a bowl and a spoon!
I am anxious to hear what other bakers thought of the ka'kat and whether anyone used the mahleb. Is this a spice that I need to acquire?? Click here to find out who else tried this recipe and what they thought!
Labels:
bread,
Tuesdays with Dorie
Sunday, April 12, 2015
Fig, Olive Oil and Sea Salt Challah
A very long time ago I printed this recipe for Fig, Olive Oil and Sea Salt Challah from the Smitten Kitchen blog. And I have been wanting to make it ever since, it just seemed to never happen. When I was planning my sort of spur-of-the-moment Easter meal I remembered this recipe and decided it needed to be part of Easter. I had all of the ingredients on hand so it clearly was meant to be. Wow, am I glad I did! Besides looking BEAUTIFUL (I seriously love the round braided look), it tastes absolutely delicious. Yummy, get-in-my-mouth-right-now, might-could-eat-the-entire-loaf, good. And guess what? Not so hard to do!
The dough for this bread is very wet, in fact at first I worried that I did something wrong and repeatedly asked myself if I put in the right amount of flour (answer, "yes"). But I rolled with it and it turned out fine. You can make the dough in a mixer or by hand (what? Not in this busy life...). This bread is super fluffy and light. I am sure it would taste quite good without the fig filling, but WHY?? The filling is made by re-hydrating dried figs in orange juice and some water and then pureeing it down so it becomes paste-like. I could have added more liquid to mine I think, as it was VERY paste-like and hard to spread over the dough. It was totally unevenly done but I didn't actually care about that so it was all fine!
The dough is divided into 4 long ropes that are then woven around each other to form this awesome round loaf.
There was no need for butter for this bread. It was simply eaten as it was. To RAVE reviews. I will definitely be making this bread again. You should, too. It is so so delicious!
Fig, Olive Oil and Sea Salt Challah
adapted from Smitten Kitchen
makes 1 loaf
Ingredients:
Bread
2 1/4 teaspoons active dry yeast (1 packet)
1/4 cup plus 1 teaspoon honey, divided
1/3 cup olive oil, plus more for bowl
2 large eggs
2 teaspoons flaky sea salt OR 1 1/2 teaspoons table salt (my sea salt was not "flaky" so I used 1 1/2 teaspoons)
4 cups all-purpose flour
Fig Filling
1 cup stemmed and chopped dried figs
1/8 teaspoon freshly grated orange zest
1/4 cup orange juice
1/ teaspoon sea salt
black pepper - to taste
Egg Wash
1 large egg
Coarse or flaky sea salt
Directions
Dough: In a small bowl, whisk the yeast and 1 teaspoon honey with 2/3 cup warm water (110F-116F). Let it stand for a few minutes to get nice and foamy. Combine the yeast mixture with the remaining honey, olive oil and eggs in a large mixing bowl. Add the salt and flour and mix with a paddle attachment until the dough begins to come together, then switch to a dough hook. Run at low speed for 5-8 minutes. Transfer the dough to large bowl that has been lightly coated with olive oil, cover with plastic wrap, and let rise for 1 hour, until almost doubled.
Fig Filling: Combine the figs, zest, 1/2 cup water, juice, salt and a few grinds of black pepper in a small saucepan. Bring to a simmer over medium heat and cook, stirring occasionally, for about 10 minutes, until the figs are tender. Season to taste with salt and pepper and allow the mixture to cool to lukewarm. Transfer to a small food processor and process until it resembles a fine paste. Scrape the sides of the processor bowl as needed. Allow to cool completely.
Spread Figs: Once the dough has risen, turn it out onto a well floured surface and divide it in half. Place one half back in the oiled bowl and roll the other half into a wide rectangle. The size doesn't totally matter. Spread half of the fig filling over the dough, leaving an inch border around the edge. Roll into a tight log along the long side of your rectangle. Gently stretch and roll the log as long as is comfortable and then divide it in half. My log/rope ended up being 3ft 10 inches before I divided the rope into two. Repeat this process with the remaining dough and filling.
Weave! You now have 4 dough ropes of equal length. Arrange them in a tight tic-tac-toe shape, such that the knot/woven part is in the very center. Lay your tic-tac-toe so that one strand goes over/under and the next goes under/over, i.e. it is woven together. You will note that on each side of your tic-tac-toe board, one rope comes from under the knot and one comes from over. Focus on the ones coming from underneath. Take each of these "under" legs and cross them over the rope to their immediate RIGHT, keeping your rope pressed up against the center knot. Do this with all four "under' legs. Now take the legs that were the "over" legs from the beginning, and cross them each over the ropes to their immediate LEFT. If you still have additional length to your ropes, continue to repeat this process until you run out of rope. Tuck the ends and corners under the dough with the sides of your hands to form a tight woven ball. Place the dough ball to a parchment-covered heavy baking sheet or bakers peel (if you will be baking on a bakers stone).
Egg Wash: Beat the egg until smooth. Brush it over the challah. Let the dough rise for 1 hour. Approximately 15 minutes before your hour rise is over, turn on your oven to 375F.
Bake: Before placing the loaf in the oven, brush again with the egg wash and sprinkle with sea salt. Bake in the center of the oven for 35-40 minutes. The bread will be a dark golden brown. Watch your dough - if it darkens too quickly, loosely cover the top with aluminum foil for the remainder of the baking time. To check for doneness, you can VERY CAREFULLY lift up the bread and knock on the bottom, it should sound hollow. Or stick an instant read thermometer into the loaf - it will read 190-195 when the loaf is done.
Cool on a rack before slicing.
Printable Recipe
Give this bread a try. You CAN do this. It looks more complicated than it really is, I promise. And the end result is absolutely worth it!
Wednesday, October 1, 2014
Playdate Pizza!
Before we picked up the clever girl's friend, we made the pizza dough. I used Bobby Flay's recipe, which is easy to make and makes a tasty crust. The clever girl carefully kneaded the dough before we left it alone to rise.
I made the scary decision to pre-bake the crust a little before adding the toppings. I bake it on a pizza stone in a really hot oven (450F+) for about 5 minutes. This means that when you put the toppings on, you are dealing with a hot crust on a SUPER hot stone. I decided to brave the hot stone and wrap the visible areas with kitchen towels to prevent burns. These awesome girls are 6 so when I explained that the stone was super hot so they could not touch any of the toweled areas, they were very careful and did just fine. Phew! I had prepared all of the toppings in separate bowls in advance... the sauce and different cheeses were all ready.
Pizza Dough
adapted from Bobby Flay
makes 2 14-inch pizza crusts
Ingredients:
3 1/2 to 4 cups bread flour, plus more for rolling (bread flour yields a crispier crust. If you substitute all-purpose flour, you will get a chewier crust)
1 teaspoon sugar
2 1/4 teaspoons instant dry yeast
2 teaspoons kosher salt
1 1/2 cups water, 110F
2 TB olive water, plus 2 teaspoons
Directions:
Combine the flour, sugar, yeast and salt in the bowl of an electric mixer. With the mixer running, slowly add the water and 2 TB olive oil and mix until the dough forms a ball. If the dough is sticky, add more flour, 1 TB at a time, until the dough is a solid ball. If the dough is dry, add more water, 1 TB at a time. Scrape the dough onto a lightly flowered surface and gently knead into a smooth, firm ball.
Grease a large bowl with the remaining 2 teaspoons of olive oil. Add the dough and cover the bowl with plastic wrap. Place the bowl in a warm location and let it double in size, about 1 hour. Turn the dough out onto a lightly floured surface and divide into 2 equal pieces. Cover each with a clean tea-towel or plastic wrap, and let rest for 10 minutes.
Place a baking stone in the oven and preheat the oven to 450F+. Sprinkle cornmeal over a pizza peel or rimless baking sheet. Press and gently tug one piece of dough into a 14-inch circle on the peel or baking sheet. When the oven is heated, gently slide the crust onto the stone and pre-bake for 5 minutes. OR you can skip this step. Shape the dough and cover with your choice of pizza toppings. Gently slide the pizza onto the hot stone and bake for 15-20 minutes, until crust is golden and cheese is bubbly.
Printable Recipe
This was a total hit! The girls had such fun making their own pizza! We used shredded mozzerella, fresh mozzarella and Parmesan. Yum. The cheesier the better, right?
Tuesday, September 16, 2014
TWD: Baking with Julia - French Bread
Do you see that beautiful basket of bread?? I baked it!! I really did! I can hardly believe it. I really, really wanted to succeed with this week's Tuesday with Dorie recipe, making French Bread, and I did! Yahoo!
We are all friends here so I will be completely honest. This recipe scared me. I just had this idea that there was no way that I was going to be able to accomplish baking a batard or baguette. Especially not in Houston. Humid climates are not helpful in bread baking, so that was a major strike against me. But I beat the odds, I guess. You never know what you can do until you try, do you? Can you tell I did the happy dance all over the kitchen when they came out of the oven? And AGAIN when I tasted one? Ahhh. Delicious freshly baked bread. Is there ANYTHING more wonderful???
I am not going to go step by step through this recipe, because let me tell you, there were lots of steps. However, at the same time, it wasn't totally overwhelming. I mean, I was able to complete the last part while making dinner AND helping the clever girl with her homework (homework, in first grade!!) AND attempting to keep the clever boy from opening up my flour container and shaking it all over the floor handful by handful (his new totally favorite thing to do, ugh). And it turned out well! So, if my totally multi-tasking self could accomplish this bread, YOU CAN TOO!
A couple of things about this recipe:
Oh, and the taste? Yum. The bread had a great crust on the outside and was soft and airy on the inside. The flavor was great, like most baguettes I have eaten out. Are you up for a challenge? Give this recipe a try. The recipe and video give great explanations, and I believe you will find success! The IDEA of this bread is scarier than the reality. You can find the recipe on pages 123-127 of Baking with Julia, or here.
Truly, the feeling of accomplishment and success is worth the work of this recipe! Yeah, me! Now it's your turn!
We are all friends here so I will be completely honest. This recipe scared me. I just had this idea that there was no way that I was going to be able to accomplish baking a batard or baguette. Especially not in Houston. Humid climates are not helpful in bread baking, so that was a major strike against me. But I beat the odds, I guess. You never know what you can do until you try, do you? Can you tell I did the happy dance all over the kitchen when they came out of the oven? And AGAIN when I tasted one? Ahhh. Delicious freshly baked bread. Is there ANYTHING more wonderful???
I am not going to go step by step through this recipe, because let me tell you, there were lots of steps. However, at the same time, it wasn't totally overwhelming. I mean, I was able to complete the last part while making dinner AND helping the clever girl with her homework (homework, in first grade!!) AND attempting to keep the clever boy from opening up my flour container and shaking it all over the floor handful by handful (his new totally favorite thing to do, ugh). And it turned out well! So, if my totally multi-tasking self could accomplish this bread, YOU CAN TOO!
A couple of things about this recipe:
- It calls for 0.6 ounces of fresh yeast. I have never found that in the grocery store and substituted 2.5 teaspoons of instant yeast instead. This amount was determined after checking many conversions online that mostly agreed.
- You can make this bread by hand, in which case you have to knead the dough for 10-15 minutes with your big muscley-muscles, or make it in your heavy-duty stand mixer. I opted to use the mixer. That was what I initially thought and then when I watched the video and saw that Danielle Forestier kneaded and turned the bread over 800 times, my inclination for the stand mixer was confirmed. There is no way my current multi-tasking brain would be able to manage 800 turns.
- There are specific times given for different steps for this recipe. I underlined each of them in my book so I wouldn't miss them.
- I found the video quite helpful for shaping the batards. Unfortunately, I started shaping the first one and then started watching the video, so the outside of that loaf got a bit dry. You can tell if you look closely at the sort of bumpier looking loaf that I tried to hide a bit in the basket above. However blemished this loaf was on the outside, it was still delicious. You can't judge a book by it's cover!
Oh, and the taste? Yum. The bread had a great crust on the outside and was soft and airy on the inside. The flavor was great, like most baguettes I have eaten out. Are you up for a challenge? Give this recipe a try. The recipe and video give great explanations, and I believe you will find success! The IDEA of this bread is scarier than the reality. You can find the recipe on pages 123-127 of Baking with Julia, or here.
Truly, the feeling of accomplishment and success is worth the work of this recipe! Yeah, me! Now it's your turn!
Labels:
baking,
bread,
Tuesdays with Dorie
Friday, August 22, 2014
TWD: Baking with Julia - Baking Powder Biscuits
My apologies for being so dreadfully late with this post. I honestly thought I'd be EARLY, but ahhh, best laid plans. I got my weeks mixed up and thought that our TWD week was the previous week, so I made these biscuits and was all proud of myself and then realized my date error. No big deal though, now I'd have time to get the post done and up in advance, right? Well, evidently not! Where is that free time I sometimes have to create my posts? It seems to have gotten lost, so if you happen to find my free time, would you please send it back? It is sorely missed.
I made a half batch of the butter ones, as really, how many biscuits does one family need? Oh, and I used frozen butter to ensure I'd have some nice fluffy layers....
When Mr. Clever Mom came home, I asked him to taste one biscuit from each pan and tell me what he thought. Note that the pans are now switched, sorry, but the shortening ones are on the left and the butter on the right. He said that he thought that the LEFT biscuits were more BUTTERY, but the RIGHT biscuits have a nicer TEXTURE. Huh. Super confusing, considering the fact that the LEFT biscuits are the shortening biscuits! (I asked him to eat another to verify his analysis.)
Looking at the photos above, you can see that the butter-made biscuits spread a bit, while the shortening ones did not. Neither batch rose how I thought they should, though. And I used a brand new container of baking powder...
Since I made these in advance, I decided to give the recipe another shot. This time I used 1/2 shortening and 1/2 butter in the recipe.
Good, but I thought that the texture wasn't as good as either of the first two batches. On this batch, I did not put them into the pan touching, to see if maybe that had anything to do with them not rising much. Obviously, that did not make a difference.
So why didn't they rise as much as they theoretically should have risen? The photo in the book shows puffy, tall biscuits. I was SUPER careful to use a very light hand and stop mixing before it was over done, only kneaded the dough the suggested 10 times, etc. I did mix the dough with my hands, could my body heat have anything to do with it?
I did not twist the biscuit cutter after using, I lifted straight up. But I didn't flour it each time, so maybe it stuck to the edges a bit, preventing them from rising up. Or maybe my biscuit cutter is too old, so the edge has gotten dull, so it squishes the edges together when it cuts, again preventing the rising. Hmmph. Any thoughts? I would love a big fluffy biscuit.
But here is another question. Why do people make baking powder biscuits instead of buttermilk ones? Could I use buttermilk in this recipe instead of the milk?? That might be worth a try...
The recipe can be found here, or on pages 211-212 of Baking with Julia.
So, I know this post is dreadfully late, but I hope some of my TWD bakers will let me know their thoughts. I want to perfect the biscuit!
Labels:
baking,
bread,
Tuesdays with Dorie
Tuesday, July 1, 2014
TWD: Baking with Julia - Leaf-Shaped Fougasse
The bizarre looking thing above is a Leaf-Shaped Fougasse, which is really a fancy way of saying that it is (or is supposed to be) a leaf-shaped focaccia bread. If you think LEAF in your head, I guess it sort of looks like a leaf, right? Right?
Honestly, I am not sure why one might make a leaf-shaped focaccia bread. Maybe for a bread basket at a fancy Thanksgiving dinner? But then it would be sliced up already so no one would see the leaf shape. But I guess you could say this about any fancy shaped bread - the braids, the wreaths, etc. And I do love those. Maybe I was just not as excited about the leaf.
However, the dough is not at all difficult to make, only sort of time consuming, as it has to rest for at least overnight if not a bit more in order to get the texture that you want. And honestly, it must be pretty forgiving dough, as I messed up a bit and then had to finagle it a bit and it still worked out! I made a half recipe, and when I was measuring out my 3 1/4 cups of flour, I accidentally grabbed my 3/4-cup measure instead of the 1-cup measure. I kept thinking, "wow, this dough is really sticky and moist" and silently cursing the humid climate we have here in Houston. So I added a little more flour, and then a little more.... I did get the "window" in the dough, so I hoped for the best. I set the dough aside to rest for the first rise and started cleaning up the kitchen, and then noticed the cup measure switcheroo. Hmmm. I did debate in my head tossing the entire thing out and starting over, but laziness prevailed and I just hoped for the best. And it worked! So there you go! Forgiving dough! Bread success after chaos! I'll take it!
My fougasse looks so weird because I had troubles transferring the dough from my peel, where it looked nice and pretty and was a decent take on the photo in the book, to the hot baking stone in the oven. The dough preferred to stay on the peel, even though it was nicely dusted with cornmeal to help it slide better. I had to shimmy and shake it onto the stone and then sort of reshape it before slamming the oven door. I wonder if anyone else had a better method of transfer??
This is a tasty dough, and has a nice chew. I reviewed my thoughts of this recipe for when we did the focaccia, and that time I made it too thin and didn't get the nice puff that foccacia is supposed to have. This time I did and it was much better! I think the lesson to be learned here is to GO WITH THE FLOW and it will all turn out okay!
A nice lesson for life, I think!
This recipe can be found on pages 146-147 of Baking with Julia. Check out how the other bakers fared with this recipe by going to the TWD blog and clicking on LYL- Leaf-Shaped Fougasse.
Labels:
bread,
Tuesdays with Dorie
Tuesday, June 3, 2014
TWD: Baking with Julia - Savory Wheat Crackers
I did change the recipe a tad bit... First, I cut it down a LOT. The recipe yields 12 dozen. And while, yes, we love crackers around here, I really don't relish the thought of making 12 dozen of them! That's a crazy amount of crackers! So I made 1/3 of the recipe - the most logical reduction for me with ingredient amounts. Also, the recipe called for some seeds that I don't generally have on hand - anise seeds and nigella seeds (I don't actually even know what nigella seeds are!!) and I didn't feel like finding and buying them so that I could use a teensy weensy bit, like less than 1/4 teaspoon! The seeds are simply sprinkled on top, so I substituted pumpkin seeds and sesame seeds. I also ended up baking the crackers for much longer then specified. The recipe states that they cook for 2 1/2 to 3 minutes. Mine, after that amount of time, were not at all crisp. And they didn't crisp up when they were out of the oven, either. Limp crackers are no good! So I cooked the next batch for more like 4 1/2 minutes and they actually crisped up nicely! It is amazing how the limp, blah cracker became so great! The crisp texture really helped the flavor - it is probably a brain thing, but really, crackers should go "crack" when you bite them, right?
All in all, these are good crackers, from an easy recipe to adjust to your own liking. Will I make them again?? We'll see. They'd be great at a dinner party with some specialty cheese or something, I think. You could flavor them a zillion different ways, so they are certainly versatile!
You can find the recipe for Savory Wheat Crackers on pages 163-164 of Baking with Julia, or by following this link. I would bet that my fellow TWD bakers have come up with all sorts of interesting combinations for these crackers, so to check out some of those blogs, see the list here.
Labels:
bread,
Tuesdays with Dorie
Tuesday, April 29, 2014
TWD: Baking with Julia - Rewind.... White Loaves!
Since there were five Tuesdays this month, this last one gives the Tuesday's with Dorie bakers a chance to re-do a recipe or make one up that we missed. I made the White Loaves, which were actually the very first recipe that the group ever made, back on February 7, 2012! I started the group a bit later, so I missed the first few recipes. I think I am totally caught up now, though!
Anyway, I am not sure why it took me over 2 years to make this bread, because it is delicious. I don't generally buy white bread, because I don't care for the white generic squishy Wonder-bread type white bread that I think of. This is still nice and soft in the middle, but has a much better chew. And the flavor is very mild and nice. This bread is fantastic for a piece of toast in the morning, for a sandwich, slathered with butter and garlic for garlic bread, you name it! I was so proud to send the clever girl to school with a sandwich with homemade bread in her lunchbox! And that's because she ASKS for it. She wants the new bread. Yeah!
White Loaves
adapted from Baking with Julia
Ingredients:
2 1/2 cups warm water (105 to 115 degrees F)
1 tablespoon active dry yeast
1 tablespoon sugar
7 cups (approximately) bread flour or unbleached all-purpose flour
1 teaspoon salt
1/2 stick (2 ounces) unsalted butter, at room temperature
Directions:
Pour 1/2 cup of the warm water into the bowl of a heavy duty mixer. Sprinkle in the yeast and sugar and whisk together gently. Allow to rest for about 5 minutes, until the mixture is creamy.
Using the mixer and dough hook, add the remaining water and about 3 1/2 cups of the flour to the yeast. Go slowly, so you don't get a flour explosion all over your kitchen! Keep that mixer on low speed. Once these initial cups of flour are mixed in, slowly add the remaining 3 1/2 cups. Increase the mixer speed to medium and beat until the dough comes together. Stop the mixer and scrape down the bowl and hook as needed. If the dough doesn't come together, add a bit more flour, one tablespoon at a time. Add the salt and continue to mix on medium speed for about 10 minutes. You may need to give your mixer a little hug to keep her from dancing off of the counter. A reassuring hand should do the trick. If your mixer refuses to mix this dough, no worries. Mix it about halfway in the mixer if you can, and then dump it onto a lightly floured board and knead by hand for 8 to 10 more minutes. When the dough is thoroughly mixed it will be smooth and elastic. Add the softened butter, a tablespoon at a time, and beat until incorporated. Your mixer will probably think this is just fine. Butter makes everyone happy!
Turn the dough onto a lightly floured surface and shape into a ball. Place in a large buttered bowl (something that can hold double the amount of the ball). Turn the ball all around to cover the entire surface with butter. Cover the bowl tightly with plastic wrap and allow to rest at room temperature for 45 minutes to 1 hour, until it doubles in size.
Butter two loaf pans (8 1/2 by 4 1/2 inch) and set them aside.
Deflate the dough and turn it onto a work surface. Divide in half and set one half aside. Using your palm or a rolling pin (I used my hand) pat the dough into a rectangle about 9 inches wide and 12 inches long, with a shorter side facing you. Starting at the top, create an envelope fold in the dough. Fold the top edge 2/3 of the way down the dough, as if you were folding a letter. Now fold it again, so the bottom of your page meets the fold you made. Pinch the seam together. Turn the roll so that the seam is on the center of the dough, facing up. Fold in the ends of the dough a little if necessary, so they will fit into the pan. Pinch all seams to seal and turn the loaf over so all seams are on the bottom. Gently pick up the dough and place it into one of your prepared pans. Repeat with the second half of the dough.
Cover the loaves loosely with buttered plastic wrap and allow them to rise in a warm place (about 80F) until they double in size again, about 45 minutes. They will grow over the tops of the pans a bit.
While the loaves rise, center a rack in the oven and preheat to 375F.
To test if the loaves are fully risen, poke your finger in the top. If the impression stays, they are done! Bake for 35-45 minutes, until they are golden brown and an instant read thermometer stuck into the center of the bottom of the bread reads 200F. To make this part easier, once the bread has baked for about 25 minutes, open the oven, tip the loaves out of their pans, and put them back in. This will help them brown along the sides AND make it much easier to take the bread's temperature! Allow to cool, removed from the pan, on a rack. This bread should not be cut until they are almost completely cool. Waiting is the hardest part!
The bread can be kept in a brown paper bag for a day or two before it is cut. Once it is sliced, turn it cut side down on a counter or cutting board and cover with a tea towel. To store a bit longer, wrap airtight with plastic wrap and freeze for up to one month. Thaw, still wrapped, at room temperature.
Printable Recipe

I think my bread should have risen a bit more, maybe. Though I am not sure why it didn't. The crumb on the inside was good... I did feel like the bread was pretty sticky when I set it out for the first rise, maybe I should have kneaded it more?? It has gotten very humid here (can summer really be here already?? NO NO NO!!) so maybe the humidity is a factor as well. Regardless, it was delicious and I will definitely make it again.
Anyway, I am not sure why it took me over 2 years to make this bread, because it is delicious. I don't generally buy white bread, because I don't care for the white generic squishy Wonder-bread type white bread that I think of. This is still nice and soft in the middle, but has a much better chew. And the flavor is very mild and nice. This bread is fantastic for a piece of toast in the morning, for a sandwich, slathered with butter and garlic for garlic bread, you name it! I was so proud to send the clever girl to school with a sandwich with homemade bread in her lunchbox! And that's because she ASKS for it. She wants the new bread. Yeah!
White Loaves
adapted from Baking with Julia
Ingredients:
2 1/2 cups warm water (105 to 115 degrees F)
1 tablespoon active dry yeast
1 tablespoon sugar
7 cups (approximately) bread flour or unbleached all-purpose flour
1 teaspoon salt
1/2 stick (2 ounces) unsalted butter, at room temperature
Directions:
Pour 1/2 cup of the warm water into the bowl of a heavy duty mixer. Sprinkle in the yeast and sugar and whisk together gently. Allow to rest for about 5 minutes, until the mixture is creamy.
Using the mixer and dough hook, add the remaining water and about 3 1/2 cups of the flour to the yeast. Go slowly, so you don't get a flour explosion all over your kitchen! Keep that mixer on low speed. Once these initial cups of flour are mixed in, slowly add the remaining 3 1/2 cups. Increase the mixer speed to medium and beat until the dough comes together. Stop the mixer and scrape down the bowl and hook as needed. If the dough doesn't come together, add a bit more flour, one tablespoon at a time. Add the salt and continue to mix on medium speed for about 10 minutes. You may need to give your mixer a little hug to keep her from dancing off of the counter. A reassuring hand should do the trick. If your mixer refuses to mix this dough, no worries. Mix it about halfway in the mixer if you can, and then dump it onto a lightly floured board and knead by hand for 8 to 10 more minutes. When the dough is thoroughly mixed it will be smooth and elastic. Add the softened butter, a tablespoon at a time, and beat until incorporated. Your mixer will probably think this is just fine. Butter makes everyone happy!
Turn the dough onto a lightly floured surface and shape into a ball. Place in a large buttered bowl (something that can hold double the amount of the ball). Turn the ball all around to cover the entire surface with butter. Cover the bowl tightly with plastic wrap and allow to rest at room temperature for 45 minutes to 1 hour, until it doubles in size.
Butter two loaf pans (8 1/2 by 4 1/2 inch) and set them aside.
Deflate the dough and turn it onto a work surface. Divide in half and set one half aside. Using your palm or a rolling pin (I used my hand) pat the dough into a rectangle about 9 inches wide and 12 inches long, with a shorter side facing you. Starting at the top, create an envelope fold in the dough. Fold the top edge 2/3 of the way down the dough, as if you were folding a letter. Now fold it again, so the bottom of your page meets the fold you made. Pinch the seam together. Turn the roll so that the seam is on the center of the dough, facing up. Fold in the ends of the dough a little if necessary, so they will fit into the pan. Pinch all seams to seal and turn the loaf over so all seams are on the bottom. Gently pick up the dough and place it into one of your prepared pans. Repeat with the second half of the dough.
Cover the loaves loosely with buttered plastic wrap and allow them to rise in a warm place (about 80F) until they double in size again, about 45 minutes. They will grow over the tops of the pans a bit.
While the loaves rise, center a rack in the oven and preheat to 375F.
To test if the loaves are fully risen, poke your finger in the top. If the impression stays, they are done! Bake for 35-45 minutes, until they are golden brown and an instant read thermometer stuck into the center of the bottom of the bread reads 200F. To make this part easier, once the bread has baked for about 25 minutes, open the oven, tip the loaves out of their pans, and put them back in. This will help them brown along the sides AND make it much easier to take the bread's temperature! Allow to cool, removed from the pan, on a rack. This bread should not be cut until they are almost completely cool. Waiting is the hardest part!
The bread can be kept in a brown paper bag for a day or two before it is cut. Once it is sliced, turn it cut side down on a counter or cutting board and cover with a tea towel. To store a bit longer, wrap airtight with plastic wrap and freeze for up to one month. Thaw, still wrapped, at room temperature.
Printable Recipe
I think my bread should have risen a bit more, maybe. Though I am not sure why it didn't. The crumb on the inside was good... I did feel like the bread was pretty sticky when I set it out for the first rise, maybe I should have kneaded it more?? It has gotten very humid here (can summer really be here already?? NO NO NO!!) so maybe the humidity is a factor as well. Regardless, it was delicious and I will definitely make it again.
Labels:
baking,
bread,
Tuesdays with Dorie
Monday, March 10, 2014
Giant Italian Bread
I recently offered to bring fresh bread to a dinner party. I am trying to get better at baking bread, so the more I make, surely the more I'll learn, right? I hope so, anyway. They asked for Italian bread, so I found a recipe that got rave reviews and went for it. And boy, am I glad I did! I wish I had photographed the bread with a ruler or something nearby, because this loaf of bread was ginormous! Next time, I will make two loaves and maybe freeze one but for the dinner party, having this one giant loaf was perfect. I found the recipe at Food Network, and it is from Emeril Lagasse. I wouldn't necessarily have searched out an Emeril recipe for bread, but obviously his skills extend way beyond my imaginings. This bread was a great success!
Tuesday, February 11, 2014
TWD: Baking with Julia - Onion Bialys
PRETEND THERE IS A REALLY NICE PICTURE HERE OF MY BEAUTIFUL ONION BIALYS
I really did make them, I promise. In fact, I actually made them early, as the week for posting this recipe changed and I didn't realize it until after I made them! And I even took pictures. Truly, I did. However, between taking the pictures and uploading them to my computer, and sitting down to type this blog post, my computer CRASHED. As in, it is dead. As I type, there are computer experts trying to extract all of my data from that darned thing. Please, please save my photos, I told them. Because not only are my baking and other creations on that computer, but the photographs of my most important creations are on there as well. My kids! Ugh. In fact, every single photo of the clever baby is on that machine. Please, please save my photos, oh brilliant computer experts. Please! Can we all send up a prayer to the computer gods together, right now? Okay, on the count of three.... 1...2...3..."Please save those photos!!!"
All right, on to the recipe. This week's recipe for Tuesday's with Dorie is Onion Bialys. In case you are like me, and have no idea whatsoever what a bialys might be, let me help out. It is very similar to a bagel, except it is only baked (not boiled and then baked like a bagel) and instead of having a hole in the middle, it has a depression that is usually filled with chopped onions. Close your eyes and visualize that with me, since there are no pictures to help out. Got it?
Labels:
baking,
bread,
Tuesdays with Dorie
Tuesday, January 7, 2014
TWD: Baking with Julia - Country Bread
Our Tuesday's with Dorie recipe this week is Country Bread. You might also call this "Bread Success", or "yahoo, I did it" bread. Though I knew what the recipe was for this week well enough in advance, the date actually snuck up on me so I was scrambling a bit to get it done. This bread (like many in this book) has several steps, one which involved an optional overnight rise. I wanted to do that overnight rise, as according to the book it would give the bread a kick of sourdough flavor, which I love. So once I realized that my time was running short, I busted a move on making this bread! Thanks to recently making Pumpernickel Loaves, I already had all of the ingredients on hand! (Rye flour isn't usually a standard pantry item in my house...)
Labels:
baking,
bread,
Tuesdays with Dorie
Wednesday, December 4, 2013
TWD: Baking with Julia - Challah
Our recipe this week for Tuesdays with Dorie was Challah. Yes, I know, it is Wednesday, but I promise I had this bread baked on time, I just didn't get to the blog on time! Apologies! I made the Challah bread for Thanksgiving dinner, as did many of my TWD cohorts. The recipe makes 2 loaves, so we ate one with dinner and the other I froze so I can make French toast this weekend.
There is something amazingly therapeutic about braiding bread. I love it. Feeling the long soft strands and weaving them together to make a beautiful loaf is really rewarding to me. Why don't I make this more often??
Labels:
baking,
bread,
Tuesdays with Dorie
Tuesday, November 5, 2013
TWD: Baking with Julia - Pumpernickel Loaves
Our recipe this week for Tuesday's with Dorie is Pumpernickel Loaves. The recipe is on pages 95-98 of Baking with Julia, and can also be found here. Though I have never made pumpernickel bread before, this recipe is a bit different in that the ingredient list includes unsweetened chocolate, espresso powder, molasses and prune butter. Now, I must be totally honest here and admit that pumpernickel bread is not my favorite. I like it okay, but it is never something I would choose at a deli or anything. Honestly, I am not really a rye fan and since pumpernickel is in the rye family, it's just not my fave. However, I gave this bread my best efforts anyway. (to not such great results, unfortunately!!)
I actually made the dough twice. The first time, I got all the flour in that the recipe called for and thought that it just didn't seem to fit the description that the recipe claimed. It said the dough should be a very moist dough, very soft and elastic. Not so much in my bowl. I went through the first and second rise and then decided that it just was not right and pitched it right into the trash. In the mean time, I watched the video as to how to bake this bread. If you have ANY desire to bake this bread, I HIGHLY recommend watching this video. The recipe gives this complicated description as to how to roll and shape the bread which makes a ton more sense after watching the video. You can see the video here. It is always fun to watch these clips to see Julia Child's expressions and hear her comments, so you might just want to watch it for the pure entertainment value!
When I attempted the dough for the second time, I really tried to channel Lauren Groveman (the recipe author) and imitate what I watched in the video. I failed somewhere along the way, however. This time I did not put in as much flour, yet still my dough was not "very moist and elastic". She quite specifically stresses that you will need about 6 cups of flour in the dough, though the second time I only added closer to 5 cups Still, I felt like my dough was closer to what she described when I was closer to 3 cups. But I was hesitant to just stop there since she was so adamant on the 6 cups! Maybe this is where I went wrong?? I don't know. What I can say is that my bread turned out very dense, not nearly as light and puffy as they should have been. The dough did rise well during both the first and second rise. It did not rise much while it rested (suspended by cabinet pulls in tea-towel slings - how fun!), and then didn't rise a whole lot in the oven either.
Please, fellow TWD bakers, help me figure out where I went wrong. I really want to bake bread better than this!
The clever girl and I had some of the bread with breakfast - hers with a schmear of peanut butter and mine with a schmear of homemade apple butter. Even though the bread was more dense than I prefer, it was pretty tasty! I used less caraway seeds than the recipe called for, using only the whole seeds, none of the ground, so there was less RYE taste. Stay tuned this week for the crock pot apple butter recipe!
Be sure to check out some of the success stories for this bread by heading to the TWD site and checking out the blogs of the other bakers!
Labels:
baking,
bread,
Tuesdays with Dorie
Friday, October 4, 2013
Cranberry Orange Quickbread
Let's just say I am sick of hot weather. Yes, we still have hot weather here. I read all sorts of blogs with posts about fall weather happening and I am just green with envy. We are still running our air conditioner, are still hot and sweaty outside, and are still swatting at those d*** mosquitos outside. Ugh. So I am trying to bake some coldness into my world. I know, it sounds crazy since baking means using an oven which means hot temperature but I am thinking less literally than that. Coldness as in the ambiance of flavors, the overall feeling that different flavors give you. Like a cranberry orange quickbread. Cranberry/orange makes me think of winter. Coldness, see? Winter = cold (well, in most places anyway). Thus came the cranberry orange bread to my kitchen.
The recipe is from Anne Burrell. That crazy haired woman can cook. And this recipe works. The flavors are spot on. And, important in my world, it is super fast to make. Seriously, I decided to start the recipe one evening when I had literally 30 minutes before a guest was coming over. I had this bread in the oven AND the dishes washed before she got to our house! Yes! The bread wasn't actually for the guest, it was for a function the next day, but we could have served it while she was there! Do you see the word "quickbread" in the title of this recipe? Take that to it's true meaning - QUICK BREAD. You got it!
Cranberry Orange Quickbread
adapted from Anne Burrell, Food Network
makes 1 loaf
Ingredients:
2 cups all-purpose flour, plus extra to flour loaf pan
3/4 cups sugar
1/2 cup brown sugar
1/2 teaspoon salt
1/2 teaspoon baking soda
1 stick cold butter, cut into pea size pieces, plus extra for buttering loaf pan
1 orange, zested (I recommend a large naval orange)
3/4 cups fresh orange juice (approx. 2 naval oranges)
1 orange, peeled, sections removed and diced
1 egg
1 cup dried cranberries
Instructions:
Preheat the oven to 350F. Butter and flour a 9x5-inch loaf pan.
In a food processor, combine the flour, sugars, salt, baking soda and butter. Pulse until the mixture is like "finely grated cheese". Add the orange zest, juice and egg. Pulse some more until just combined. Pour into a bowl and stir in the orange pieces and cranberries.
Pour the batter into the prepared loaf pan. Bake for 1 hour 15 minutes. Rotate the pan halfway through the cooking time for even baking.
Cool for about 20 minutes and then remove the loaf from the pan. Cool completely before cutting.
Printable Recipe
I would like to try this recipe with fresh cranberries. I'll have to increase the sugar a bit to compensate but I think the fresh ones would really pop in the bread. Something to work on....
Seriously, if you need a quickbread recipe, give this one a shot. Fast and delicious. What is better than that?
Friday, September 6, 2013
Orange Sweet Rolls
I tend to make sweet rolls once a year, for Christmas morning, but they are not the orange kind. In fact, I have never had an orange sweet roll before but they sounded so enticing that I had to give it a try!
These are supposed to be similar to the Pillsbury version, but I can't say whether they are or not, as I have never had them! What I can say is that the dough was nice and soft and light and the orange flavor was nice and strong. I would probably increase the cinnamon sugar mixture in the inside, and maybe add some nutmeg in there as well next time. I do not normally put an icing on my sweet rolls but this one was nice. Not so much icing that it overwhelmed me (icings on cinnamon rolls tend to do that to me) but a nice addition to the roll. One interesting thing about these rolls is that not only is the orange flavor in the icing, it is baked into the dough as well! An orange double whammy!
I prepared the rolls in the evening and baked them the following morning. I just personally can't see doing all the work for sweet rolls in the morning! That is too much for me!
Orange Sweet Rolls
adapted from Sally's Baking Addiction
Ingredients:
Dough
1 package active dry yeast (2 1/4 teaspoons)
1/2 cup warm water
fresh orange zest from 1 medium orange
1/2 cup fresh orange juice
1/4 cup sugar
1 teaspoon salt
1 large egg
2 TB unsalted butter, at room temperature
3 - 3 1/2 cups all-purpose flour
Filling
2 TB sugar
2 teaspoons cinnamon
1 TB unsalted butter, at room temperature
(I would increase the sugar/cinnamon amounts here)
Icing
1 cup powdered sugar
1 TB orange juice
fresh orange zest from 1 medium orange
1 teaspoon vanilla extract
Instructions:
Dissolve the yeast in the water and allow to bloom for about 1 minute. The yeast will get a bit creamy looking. The water should be about 105F-115F, a bit warmer than body temperature but not too hot. Stir the water/yeast mixture, then add the orange juice and zest, sugar, salt, egg, butter and 1 1/2 cups of the flour. Beat everything together with an electric mixer (stand or handheld) on low. Scrape down the sides of the bowl as needed. Using a wooden spoon, stir in enough of the remaining flour to make the dough easy to handle, about 1 1/2 to 2 more cups. The dough should be soft, not sticky, and should spring back when you poke it with your finger.
Transfer the dough to a floured surface and knead with your hands for 5-6 minutes. Form the dough into a ball and place it into a lightly greased bowl. Flip the dough over so all sides are lightly greased from the bowl. Cover the dough and let it sit in a warm place until it is doubled in size, about 1 1/2 hours.
Line the bottom of a 9x13 inch baking dish with parchment paper. Turn the risen dough out onto a floured surface and roll to a 15x9 inch rectangle. Make sure the dough is evenly thick and as squared at the corners as you can.
For the filling, mix the sugar and cinnamon in a small bowl. Spread the dough with the softened butter and sprinkle generously with the cinnamon-sugar. Roll the dough tightly along the long edge and pinch the long edge closed along the roll. This is a good time to smooth the roll and even the edges a bit. After you do this, cut the dough into 15 even rolls using a very sharp knife or thread/un-flavored un-waxed dental floss (details on how to do this here). Arrange the rolls cut side up in the prepared pan. Cover the rolls and let them rise in a warm place for 30 - 60 minutes. If you choose to bake the rolls in the morning, stop here. Put the rolls in the refrigerator overnight. In the morning, take the rolls out of the refrigerator and allow them to come to room temperature. You can sit them on the counter and wait, OR gently float the pan in a roasting pan filled with hot water, OR put the pan in the oven set at "proof" or 200F.
Preheat the oven to 375F. Cover the rolls with aluminum foil and bake for 25-30 minutes, until the tops are golden. Transfer the pan to a rack and allow to cool for about 15 minutes.
While the rolls cool,mix all icing ingredients together. When ready, drizzle the icing over the rolls and serve!
Printable Recipe
I found the buns to have a very strong orange flavor. If you prefer a lighter flavor than this, use less zest in the dough and icing!
Enjoy!
Wednesday, May 22, 2013
TWD: Baking with Julia - Savory Brioche Pockets
Our Tuesdays with Dorie recipe this week was Savory Brioche Pockets. I guess it was really a Wednesdays with Dorie for me this time, as I surely didn't get this posted on time! Ah, well. Better late than never! I truly did have the pockets done in time, I just didn't get time to post.
Anyway, these were delicious but a bit of work... The brioche dough takes a while, but it is REALLY yummy. This is the same dough that was the basis of the Pecan Sticky Buns, and the making of the dough is described on that post, if you are interested.
Moving onto these yummy little treats - they are filled with caramelized onions, mashed potatoes mixed with goat cheese, and asparagus. I know I have mentioned it before, but caramelized onions really make everything in the savory world delicious. Mmmm. The recipe had you cook the onions for only 20 minutes to caramelize, so either that is just crazy or I had my burner too low, as it normally takes me about an hour to caramelize. Regardless, caramelized onions are worth the time!
Labels:
baking,
bread,
Tuesdays with Dorie
Tuesday, April 2, 2013
TWD: Baking with Julia - Rustic Potato Loaves
This week's recipe for Tuesday's with Dorie is Rustic Potato Loaves, on pages 138-139 of Baking with Julia. I have to say, if you have any interest in baking bread, this is one to try! It is fairly quick to make (just two rises of 20 minutes each) and the end result is simply delicious!
Labels:
baking,
bread,
Tuesdays with Dorie
Tuesday, March 5, 2013
TWD: Baking with Julia - Crossants
I have to admit, I was a bit intimidated to attempt making Croissants. They are so light and flaky and buttery - is this something I could truly accomplish? Plus, when reading through the recipe, there were many steps involved with lots of resting/refrigerating/proofing times - this was an intensive project to undertake. However, I refused to be intimidated by this recipe! After putting it off again and again, I finally dug in and got started in making croissants.
In 
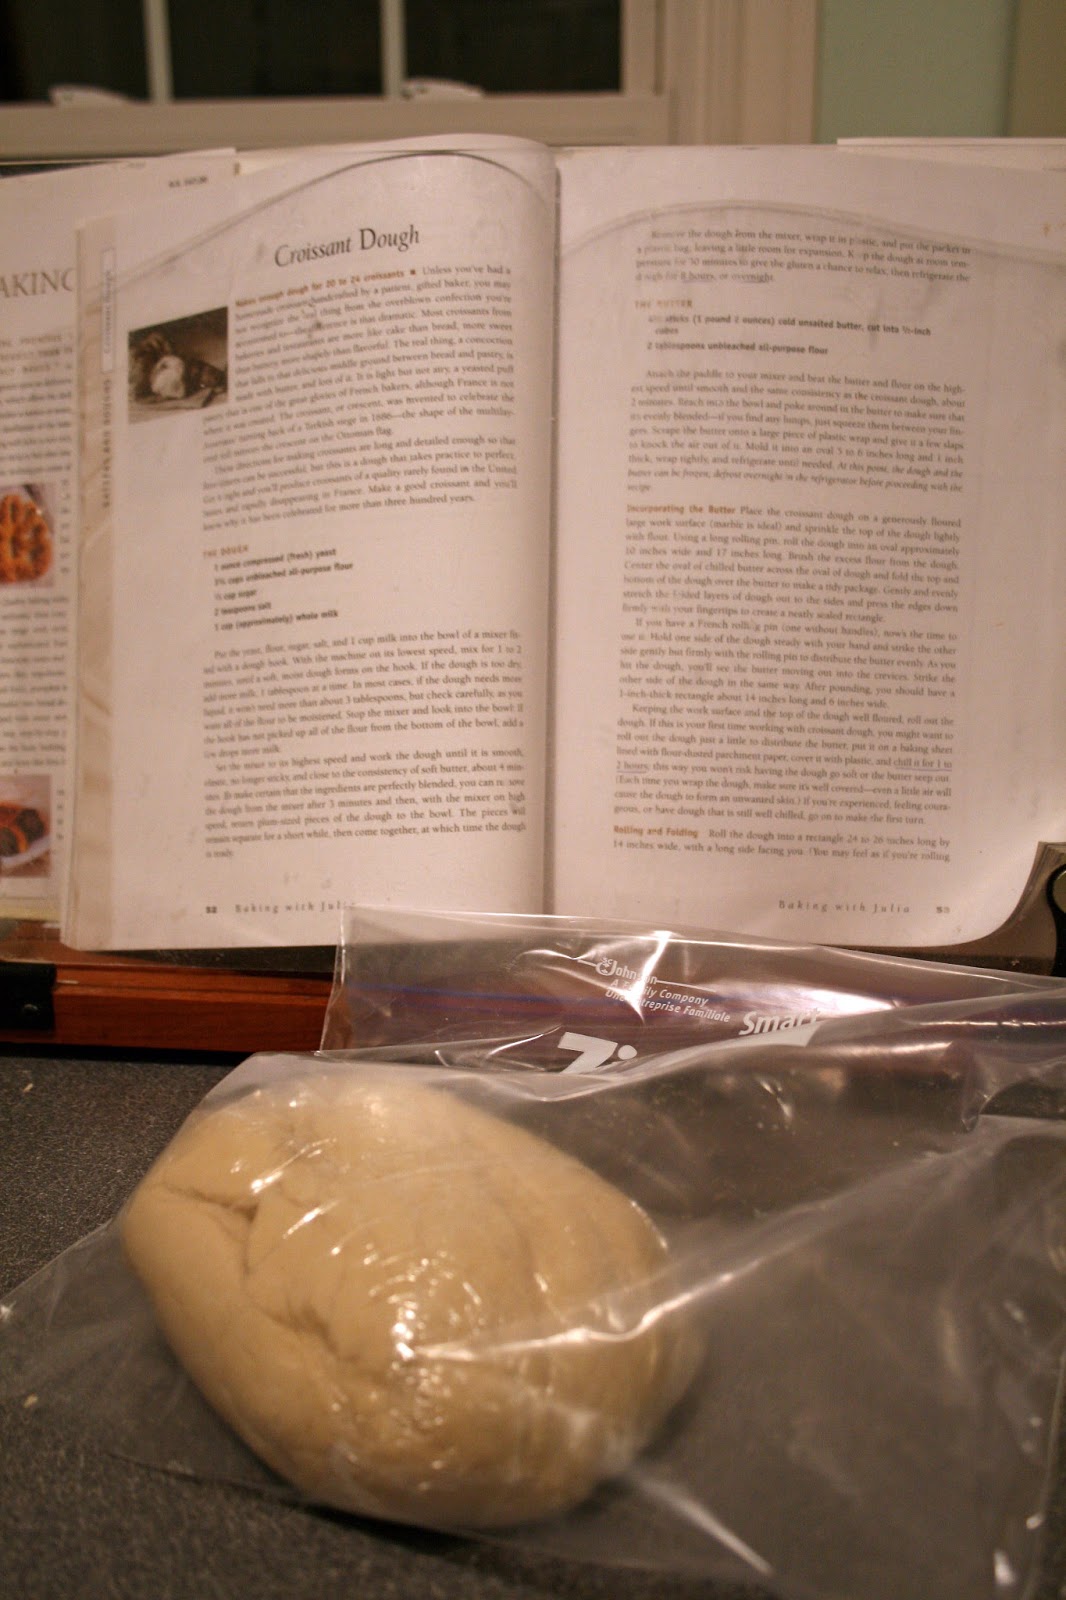
Baking with Julia, this recipe actually spans several pages. The dough recipe is on pages 52-54, while the shaping and baking recipe is on pages 185-186. You may also find the recipe on our host's blog, Girl + Food = Love.
Step 1: Make the dough
My first quandary with this recipe was with the yeast. It calls for fresh yeast, which I could not find in my grocery store and didn't have the energy to go shopping around to find. After some internet research I decided to substitute half the amount of active dry yeast. Since the recipe called for an ounce of fresh yeast, I used a half ounce of active dry yeast and hoped for the best! It worked! I mixed the active dry yeast into about 1/4 cup of warm milk and let it sit for a bit before using. Then the yeast, flour, sugar, salt, and remaining milk were put into the mixer to get moving. Let me tell you, my poor mixer did not appreciate this at all! Soothing words seemed to help and she turned out what appeared to be appropriate dough - smooth, elastic, and sort of like the consistency of soft butter. Phew! (By the way, I strongly feel that my mixer needs a name. Any suggestions out there?? My sewing machine is named Ruby, what should my mixer be named??? Help!)
Once the dough was formed, it was wrapped in plastic wrap and a plastic bag, allowed to sit for 30 minutes, and then refrigerated overnight. Step 1 complete!
Step 2: The butter!
As you know, a crucial element of croissants is BUTTER. And lots of it! For this step, I mixed 4 1/2 sticks of butter and 2 TB flour in my poor un-named mixer, which again she didn't seem to appreciate that much. I think this is because the butter was cold so it was in hard cubes for a while before it all squished down and became more pliable. Anyway, the butter is mixed and mixed until it is about the same consistency as the dough from above, then it is refrigerated until needed. None with Step 2!
Step 3: Incorporating the butter
Here is where your arm work-out begins! First, the dough is rolled out into an oval about 10 inches wide by 17 inches long. Then you plop the butter in the middle...
... and wrap it up like a package! What a fine package that would be! Now the fun part, beat it with your rolling pin! The goal here is to spread the butter out evenly along the inside of your dough, so you beat it with your rolling pin to do so. At this point, your dough is about 1-inch thick, and the rectangle is approximately 14 inches long and 6 inches wide.
Step 4: Rolling, folding, and more rolling and folding!
Remember the arm workout I mentioned? Here we go. The rectangle from Step 3 needs to be rolled into a bigger rectangle, 24-26 inches long by 14 inches wide. This takes some work! Plus a large place for rolling. The good thing about this project is it confirmed my decision to have the kitchen island in my new kitchen built at a regular counter height, no taller. It had been suggested that I could do taller for the island but after rolling out this dough, shorter would be better! Maybe in a future kitchen I can have an island with two different levels - a regular one and then a shorter one for rolling out dough... Hmmm. Am I already designing a new house when my current new house isn't even built yet? Someone take me to the looney-bin immediately!
So I digress. Apologies. Once you have your giant rectangle, fold it into thirds like a brochure which is now about 8 inches wide by 14 inches long, put it on a parchment covered baking sheet, and put it into the refrigerator for at least 2 hours. I marked the pan "1 turn" and then "2 turns" because guess what? After those 2 hours are over, you take that dough out of the refrigerator, roll it into the same giant rectangle again, fold it up, and put it back in the refrigerator!
This time, once you take it out of the refrigerator and roll it out into a gigantic rectangle again, you are finished making mere brochures, you create a BOOK! Fold both ends in towards the middle and then fold the dough in half, making a book. The "spine"of the book is closer to the rolling pin, and the "pages" are towards the bottom of the above photo. Wrap it up in plastic and refrigerate for another 2 hours!
Now we can finally turn to the second section of pages for this recipe! The above part was all in pages 52-54... now we turn to pages 185-186!
Step 5: Cutting croissants
Well, actually, before you can cut the dough into croissants, you have to ROLL IT OUT AGAIN! Yes, just when you thought your arms could take no more, we roll another rectangle. Guess what? This one is EVEN BIGGER than the last. First, cut your "book" in half width-wise, leaving you with a rectangle that is about 6 inches wide by 7 inches long (it used to be 14 inches long by 6 inches wide.) Use one piece of that dough and refrigerate the other half. Now we are rolling a rectangle that is 20-24 inches long and 15-18 inches wide. This takes a lot of work and a lot of flour for the work space! Once you have said giant rectangle, fold it in half so you now have a rectangle that is 20-24 inches long and 7 1/2-9 inches wide.
Get a very sharp knife or pizza cutter and trim one side of the dough on the diagonal a bit to start the triangular shapes. The base of each triangle should be 3-4 inches wide. I did 3 inch bases, which I think was not the best choice. When I do the second half of the "book" I'll make the bases 4 inches I think. Since you folded the dough onto itself before cutting, you actually have two triangles stacked up in each layer. Separate the triangles and now you can start rolling croissants!
Stretch the base of the triangle slightly, then stretch the length of the triangle to about double the original length. Pinch a bit of dough from the scrap you trimmed in starting and ending your diagonals, roll it into an oval and put it on the base of the triangle. Fold the top piece over and start rolling. Roll and pull a bit to the sides at the same time, until you have rolled up the entire piece and you have what looks like a croissant! Place that beauty on a parchment lined baking sheet and curl the tips down so it is "C" shaped like a croissant! Ta-da! Do this for the remaining triangles, leaving lots of space between croissants on the baking sheet for rising. Brush with an egg wash and then let them rise in a turned-off oven with a pan of steaming hot water underneath for 3 1/2 to 4 hours.
Step 6: Baking, finally!
Once the croissants have risen, brush them again with egg wash and bake at 350F for 12 minutes. Then rotate the pans top to bottom and back to front, and bake another 4-6 minutes (6 for me) until they are golden browned. Cool on racks completely before eating. VERY DIFFICULT!
Though the recipe states that the croissants are best the day they are made and should be frozen immediately if not eaten, I kept them in an airtight bag and then popped them into the toaster oven the next day and they turned out perfectly. Nice and warm and crispy. So, do what you like!
Can you believe it? I made croissants! They are light and buttery and wonderful. The clever girl ate a bite and opened her eyes wide, flung open her arms, and said "Momma! These are DELICIOUS! Wow!". (Have I ever mentioned that the clever girl is full of drama?) Regardless, I appreciate the sentiment!
In plan on making some almond croissants and some chocolate croissants with the remaining half of my dough "book" but that will be fodder for another post I think, as I haven't gotten to it quite yet!
Please visit the Tuesdays with Dorie blog and click on the LYL:Croissants tab to see what other bloggers thought of this recipe!
And, if you have any ideas as to what to name my poor mixer, please help!
Labels:
baking,
bread,
Tuesdays with Dorie
Tuesday, February 5, 2013
TWD: Baking with Julia - Focaccia
This week's recipe for Tuesday's with Dorie was Focaccia. The dough takes a long time to rise and I got a later start on it than I intended, thus this post is rather late on Tuesday, but here nonetheless!
The focaccia dough is actually rather simple to make, however it has two short rises (1 hour and then 45 minutes) and then a VERY long rest time. Long as in 24-36 hours. And even though I had read the recipe in advance and knew about the long rest time, I somehow couldn't make myself get up and get it prepared so that it would be ready in time for a Tuesday morning post. Oh well!
The dough itself is made of water, yeast, olive oil, flour and salt. It is mixed together and then divided into three balls to rest in oiled ziplock bags in the refrigerator. Take it out of the refrigerator, let it rest on the counter for another hour to get to room temperature, and you are ready to actually bake some focaccia!
Labels:
baking,
bread,
Tuesdays with Dorie
Subscribe to:
Posts (Atom)